Here you can explore an extensive collection of all perks from Dead by Daylight.
They are arranged in descending order of their usefulness — from the strongest and most versatile ones to those that provide little to no benefit in matches. They are divided into several columns showing their power level.
To find a specific character or perk, you can use the search bar.
Example of tier columns:
EXCELLENT
Incredibly strong and useful perks
GOOD
Quite effective and generally helpful perks
DECENT
Weaker perks, but still situationally useful
POOR
Limited usefulness, only in specific situations
WEAK
Perks that are almost useless in most cases
DEBUFF
Perks that can actually ruin your match
📘 DBD Slang Directory
intended for Russians
Tunelling — the killer deliberately attacks one survivor multiple times in a row.
Camping — the killer guards a hanged survivor near the hook.
Slugging — the killer puts all survivors on the ground without finishing them off.
Genrush — the survivor team quickly repairs generators, ignoring risks.
Gen — generator.
Save/Nosave — safe or dangerous zone for chase.
Killer — killer.
Survivor — survivor.
Hit — hit.
Heal — heal.
Perk — skill.
Skillcheck — reaction check.
💀 DBD Effects
Endurance — makes the Survivor immune to one hit.
Deep Wound — requires the Survivor to mend within 20 seconds or go down.
Blindness — hides all auras from the players.
Exposed — makes the Survivor vulnerable to any hit.
Oblivious — the Survivor cannot hear the Killer’s Terror Radius.
Exhausted — prevents the Survivor from using exhaustion perks.
Broken — disables healing but allows self-recovery to the dying state.
Hemorrhage — causes healing progress to regress over time.
Mangled — reduces the Healing speed.
Hindered — reduces movement speed.
Boon — a beneficial effect granted by a blessed Totem.
Hex — a negative effect tied to a cursed Totem.
Haste — increases movement speed.
Incapacitated — prevents the Survivor from performing certain interactions.
Madness — causes screams and hallucinations inflicted by The Doctor.
Revealed(work in 2vs8) — makes the player’s aura visible.
Undetectable — hides the Killer’s aura and Red Stain.
Elusive — Hides your blood pools, scratch marks, grunts of pain, and block your aura.
Bloodlust — gradually increases movement speed during a chase.
DBD Stats & Mechanics
Generator Repair Time — 90 seconds solo, reduced with multiple survivors.
Exit Gate Opening — 20 seconds base time to open exit gates.
Healing Time — 16 seconds to heal one health state.
Windows blocking Entity blocks window after 3 fast vaults
Pallets There are some killers who can vault over pallets, with a jump duration of 0 to 2 seconds.
⚡Base Speed▼
🏃 Survivor Actions:
Running Speed — 4.0 m/s base movement speed
Walking Speed — 2.3 m/s, no scratch marks
Crouching Speed — 1.15 m/s, silent movement
Crawling Speed — 0.7 m/s when in dying state
🔪 Killer Actions:
Standard Killers — 4.6 m/s (115% of survivor speed)
Part of the killers — 4.4 m/s (110% of survivor speed)
Nurse — 3.85 m/s (96.25% of survivor speed)
Lunge — speed increases by 1.5x
Miss — speed decreases by 4x
Successful attack — speed descreases by 8x
Carrying Survivor — 3.68 m/s (92% of survivor speed)
Bloodlust — +0.2 m/s per tier (max 3 tiers)
⏱️Countdown▼
🏃 Survivor Actions:
Safe Timer — The duration of the collapse will not be increased.
🔪 Killer Actions:
Dying Timer — The collapse is doubled if the partners are not safe.
✨ Combo-mode
SELECT KILLER
The Trapper
The Wraith
The Hillbilly
The Nurse
The Shape
The Hag
The Doctor
The Huntress
The Cannibal
The Nightmare
The Pig
The Clown
The Spirit
The Legion
The Plague
The Ghost Face
The Demogorgon
The Oni
The Deathslinger
The Executioner
The Blight
The Twins
The Trickster
The Nemesis
The Cenobite
The Artist
The Onryō
The Dredge
The Mastermind
The Knight
The Skull Merchant
The Singularity
The Xenomorph
The Good Guy
The Unknown
The Lich
The Dark Lord
The Houndmaster
The Ghoul
The Animatronic
The Krasue
The First
Build Name
ADDONS:
Build description…
🎵
🎵 Music Player
Dead by Daylight Soundtrack
Track 1 - Survivor's Theme
0:00 / 0:00
🔊50%
Playlist
1
Survivor's Theme
Dead by Daylight
2:00
2
Ambient Music
Atmospheric
3:18
3
Killer`s Theme
Dead By Daylight
2:01
⚙️
⚙️ SETTINGS
Character Info(PC version)
Show/hide character information when clicking on perks
Click perks to see character info
Hints & Tips
Show/hide helpful hints and tips
Helpful hints are shown
�️ Horror Atmosphere Style
Dark, cinematic atmosphere — blizzard, fog, and cold shadows
Standard design is active
⚠️Performance may be reduced due to snow animation and visual effects. Not recommended on low-end devices.
🎨Color Accessibility schemes (Deuteranopia, Protanopia, etc.) are not compatible with this style and will have no effect while it is active.
🔤Typography changes to a cinematic serif font. Some text may appear slightly different in size or spacing.
🎨 Color Accessibility
Choose color scheme for better visibility and accessibility
Standard color scheme with cyan, green, orange, red, and pink tiers
🎮 DBD Card Style
Enables the in-game card style for builds — dark background with neon glow borders, as seen in the game UI
Standard build card design is active
🎮Applies a neon-bordered card style to build previews, inspired by the in-game UI aesthetic.
Press ESC to close
HINT:
Check out the guides below the tier list — they’ll help you understand the game mechanics if you’re not familiar with them yet.
SPRINT BURST
This perk gives you a big speed burst for a short time, but puts you into Exhaustion afterward.
It’s a great Exhaustion perk since it lets you dodge the Killer’s hit, reposition into a stronger loop, or just move around the map more efficiently.
The downside is that it can’t be used while you’re Exhausted, which lasts 40 seconds.
But even with that drawback, the perk is still one of the top p icks in its category.
LITHE
When you fast-vault over any obstacle, you get a big speed boost, but it also puts you into Exhaustion.
It’s a pretty solid perk that lets you buy way more time in chase — you can rotate to another loop or just use the perk for extra mobility.
Flex doesn’t work while you’re Exhausted, but in chase it still pulls its weight and feels really strong.
WINDOWS OF OPPORTUNITY
Lets you see the auras of every intact pallet and window on the map.
It’s a super strong info perk that gives you full control over your routing. You always know which loops are still safe and which ones are already dead, so you can rotate to the right tile before the killer even gets close.
With this perk you basically run the whole chase like a script — no random guesses, no running into dead zones, no wasting time checking if a pallet is still there. You always have a backup route, you know where to greed, where to drop, and where you can safely rotate for more distance.
VIGIL
This perk greatly reduces the duration of negative status effects like Blindness, Exhaustion, and Oblivious, and also affects nearby teammates, lingering briefly after they leave your range. It’s a very strong perk that can heavily weaken killer debuffs, especially when stacked by multiple survivors. It pairs extremely well with exhaustion perks, letting you recover much faster, and provides strong value for survivability, team support, and anti-debuff play.
DEAD HARD
This perk activates after you are unhooked. While injured and running, you can use a special ability that briefly grants Endurance with a unique animation. It’s a strong tool against tunneling or in chases, often denying the killer a confirmed hit if timed correctly. However, it requires precise prediction and timing, as using it too early or too late wastes the effect, and it cannot be used while Exhausted. In skilled hands, this perk can significantly extend a chase and turn it in your favor.
DEJA VU
You can see the auras of the 3 generators that are closest to each other. You repair these generators 6% faster.
This is a very solid perk that gives you valuable information about the killer’s potential 3-gen setup. By knowing exactly which generators form the tightest cluster, you can work on breaking that triangle early, making it much harder for the killer to hold the last few generators later in the match.
It’s especially useful against killers who rely on strong area control, letting your team avoid getting stuck in an unwinnable 3-gen situation.
FINESSE
When you fast-vault a pallet or window while healthy, you perform the vault 20% faster. The perk helps you avoid the killer’s hit during vaults, giving you an extra chance in chase. It’s not always fully reliable, but it can be very useful for quickly vaulting without taking a hit, since your hitbox transitions through the vault much faster. The perk works only while you’re healthy, but it can make your vaults smoother and harder for the killer to punish.
BOTANY KNOWLEDGE
You can heal yourself and other survivors 50% faster than normal.
A nice perk that cuts down healing time by several seconds, which can be pretty useful. You can also combo it with other healing perks for even stronger value.
DECISIVE STRIKE
When you’re unhooked, this perk activates. For 60 seconds, if the killer picks you up and carries you on their shoulder, you can stun them with a quick skill check for 4 seconds. After that, the perk deactivates (doesn’t work when gates are powered).
This is a really handy perk against tunneling killers who want to immediately down you to make things harder for the other survivors. If the killer tries to rush you, they’ll waste a lot of precious time chasing you around while you use this perk, giving your team a chance to gain distance, finish objectives, or reposition safely. It’s especially strong in coordinated games where timing matters, and clever use can completely mess with the killer’s plan.
BALANCED LANDING
When you fall from any height, your movement speed gets a big boost for 3 seconds, but it causes exhaustion. Doesn’t work while you’re already exhausted.
It’s a decent perk for quickly repositioning or “reeving” around the map, but you can only really use it on elevated structures. For example, if you’re in a dead zone with a drop nearby, you can take advantage of this perk to gain some extra distance, escape a chase, or buy your team precious time.
UNBREAKABLE
You gain the ability to get up from the dying state once per match. While doing so, your recovery speed is increased by 35%.
This perk is pretty situational, since killers usually won’t leave you in the dying state. But if the killer decides to play around the slugging at the endgame—trying to down the remaining survivors—this perk can give you a second chance at survival, which can be a lifesaver in critical moments.
OFF THE RECORD
When you unhook yourself, this perk grants you 40 seconds of suppression for your grunts, scratch marks, and aura. Doesn’t work during gate interactions.
On its own, it’s a pretty strong advantage, especially against tunneling killers, making it way harder for them to track you and find your location. Even though it used to also grant resilience, it’s still a solid pick for escaping tunnelers.
IRON WILL
Your grunts become completely silent, making it much harder for the killer to track your movements by sound. This perk does not trigger Exhaustion, but keep in mind that it won’t work while you’re already exhausted.
It’s a strong stealth tool that can give you a big advantage when sneaking past the killer or hiding nearby. Standing still or moving close to the killer won’t give away your location through noise, allowing you to set up ambushes, safely rescue teammates, or reposition without drawing attention. While it doesn’t stop the killer from seeing you visually, it removes one of their main sensory cues, which can make the difference between being caught or slipping away unnoticed. This perk shines especially in tight spaces, during loops, or when the killer is camping, letting you manipulate the environment and buy precious seconds for survival or objectives.
ADRENALINE
When the exit gates are powered, you gain the ability to heal 1 Health State and get a significant speed boost for 3 seconds. The usefulness of this perk really depends on how the match goes. If the killer is chasing you near the last generator, this perk can give you a life-saving advantage, letting you escape or reposition safely.
However, if you don’t make it to the endgame, this perk won’t do much for you. Sometimes you can use it strategically to get a nice little bonus, but it’s not something you can rely on every match. It’s situational, but in the right moment, those few seconds of speed and instant healing can make all the difference between surviving or getting hooked.
ALERT
When the killer breaks pallets, walls, or generators, their aura becomes visible for 5 seconds. Pretty neat little perk for tracking info, letting you know where the killer is before you even get in their face.
It’s especially useful in chases—if you’re running through loops or trying to rotate around the map, you can catch a quick glimpse of the killer’s location and adjust your path. Not super game-changing on its own, but it can give you valuable intel, especially if combined with other perks that rely on knowing the killer’s position.
FIVE MOVES AHEAD
While you’re in a chase or inside the killer’s terror radius, the perk activates. You gain aura reading of the 5 closest pallets and windows.
It also increases your pallet drop speed by 50%. After dropping a pallet, the perk goes on a 30-second cooldown.
This is actually a really solid buff, since it improves your chase awareness a lot and basically guarantees you see the nearest resources for your next loops.
The faster pallet drop also helps you recover from the animation quicker, letting you dodge a hit—especially against ranged killers or projectile killers.
Even with the cooldown, it makes you feel way more confident in chase and helps you extend it longer, getting more value out of every loop.
MADE FOR THIS
When you heal a survivor, both of you gain Endurance for 10 seconds. If you are running while injured, your movement speed is increased by 3%. This perk can be particularly strong late in the game, for example if the killer is focusing on map control or trying to tunnel you—you can heal a downed survivor and immediately get a boost of Endurance to avoid the next hit.
It also synergizes well in situations where the killer is tunneling, because if you take a hit while under the Endurance effect, the increased speed makes it harder for the killer to catch you. Essentially, this perk gives you extra survivability and mobility, allowing you to turn healing actions into both a supportive and evasive advantage.
RESILIENCE
When you’re in an injured state, you perform actions like repairing generators, opening gates, healing, vaulting over obstacles, and more 9% faster. While the bonus isn’t huge, it can come in handy in a wide variety of situations.
This perk is especially useful during chases, whether you’re vaulting through windows or pallets, giving the killer less chance to hit you. Beyond chases, the increased action speed allows you to complete objectives faster, which can be crucial for finishing a generator or opening a gate before the killer arrives. Essentially, it gives you a slight but consistent edge whenever you’re injured, helping with both survival and objective play.
PROVE THYSELF
For every survivor within 4 meters of you who’s working on a generator you’re repairing, their repair speed is increased by 10% per survivor, up to 40%. This helps you push generators faster than usual. The effect isn’t huge and doesn’t always trigger, but it can be the difference in finishing a gen just in time before the killer shows up, thanks to the reduced skillcheck penalties.
CONVICTION
When you heal a teammate, you charge this perk. While it’s active, if you’re in the dying state and recover 25% of your health, you get the chance to stand back up for 30 seconds. During this time, you’ll have the Exhausted effect.
It’s a really unexpected perk that lets you automatically get back on your feet, giving you time to reach your teammates so they can heal you, or even to heal them if the killer is slugging. Late-game, it can let you escape to a safer spot to recover on your own, especially if you have perks like Unbreakable or similar.
BOND
Now you can see the aura of survivors within 36 meters of you. A reliable and constant aura effect that helps you track your teammates for cooperative actions or healing. Best used when playing solo.
Character Name
BUILT TO LAST
When your item runs out, you can stay in a locker for about 8 seconds to restore 99% of its charges. Each use reduces the total amount of new charges by 33%. Overall, a solid perk that can seriously extend the uptime of any item, but keep in mind you’ll need to spend a fair bit of time in the locker to fully activate it.
HOPE
When the Exit Gates are powered, you gain a permanent 5% Haste. The effect is fairly small, but it can be a deciding factor in escaping the match, making it harder for the killer to catch you—especially if they have 4.4 m/s speed. This effect is useful almost all the time (reaching the gates faster, picking up a downed Survivor, or taking a protection hit). Even though the bonus activates at the end of the trial, it can still be very helpful in certain situations.
KINDRED
When a Survivor is hooked, you gain the ability to see the Killer’s aura within 16 meters of the hook, as well as the auras of your teammates. While you are on the hook, all Survivors can see each other’s auras.
This provides strong informational value, helping you stay aware of what’s happening: you can tell who is going for the unhook, whether you should go rescue someone yourself, or focus on another objective.
Additionally, your teammates will be more likely to save you, since they can see what everyone is doing without wasting time approaching the hook unnecessarily.
You can also see the Killer’s aura near the hook, which keeps you informed if they start camping or use the hook’s position for tracking during a chase.
BABYSITTER
When you unhook a teammate, both of you see the killer’s aura for 8 seconds, and your teammate loses their scratch marks, blood pools, and gains a 10% Haste effect for 30 seconds. These are very strong buffs that can help your ally a lot if the killer decides to tunnel them, and the killer’s aura reading is additionally useful for you in many situations.
RESURGENCE
When you are unhooked, you already gain a large amount of healing progress, allowing you to heal much faster. It feels pretty nice to have this bonus on unhook, as it makes your healing extremely quick and prevents the killer from injuring you again. However, this effect can only trigger twice per match, or sometimes you might not get hooked at all, but the bonus is still very noticeable.
CHAMPION OF THE LIGHT
When you shine your flashlight, you gain 50% Haste. When you blind the killer, their movement speed is reduced by 20% for 6 seconds. The perk has a 40-second cooldown. A fun perk that makes blinding the killer more comfortable and gives you a bit more time in a chase. However, you can use it only once per chase because of the cooldown. Still, in some situations it can be very useful.
ENCOURAGEMENT
When you are close to the hook with your teammate, you can use ENCOURAGEMENT to freeze their hook timer and Skill Checks for 30 seconds. It only works for one hook state. The perk itself is situational, but it can give your ally much more time to stay alive, allowing the team to regroup and try to unhook them — especially if the killer likes to camp.
LAST STAND
The perk activates after you’ve been in the killer’s terror radius for 90 seconds. Once active, it lets you vault obstacles with a unique animation and can briefly stun the killer if they’re close to you. It’s a fun perk that can sometimes save another survivor if they’re standing near a window, or you can simply use it in a chase where the killer can’t hit you and instead might get stunned, which really ruins their momentum.
SCENE PARTNER
When you stare at the killer, you will scream several times in a sequence and reveal the killer’s aura for 6 seconds. The perk has a 40-second cooldown. The condition is pretty simple, and in return you get a good aura-reading effect that can help you keep track of the situation. However, in many cases you can already see what the killer is doing if you’ve spotted them, and the screams may even work against you by giving the killer a hint that you are nearby or by interrupting your actions. Still, the perk remains a good source of information that can reveal the killer’s aura multiple times through the repeated screams (if you get lucky).
DARK SENSE
When repairing a generator, if the killer approaches you within 24 meters, his aura is revealed for a short time. A decent skill for information, can also be used for example at the beginning of a chase or during stealth.
EXTRASENSORY PERPECTION
To activate the perk, you need to crouch for 4 seconds. After that, you can see the auras of survivors, the killer, the hatch, pallets, generators, chests, exit gates, and totems within a 44-meter radius.
While it’s active, you also gain the Elusive and Oblivious status effects.
All effects linger for 11 seconds after you stand up.
The perk has a 40-second cooldown.
This is an insanely strong aura-reading perk that can basically reveal almost the entire state of the map. It’s super useful in many situations: tracking the killer’s actions, finding the last generators, locating hex totems, the hatch, or key pallets. You can use it pretty much anywhere, just do it wisely since it does have a small but cooldown.
NO ONE LEFT BEHIND
When the gates are powered, you can see the auras of all your allies. You can unhook them and heal them 100% faster, granting them an additional +10% movement speed and extending this effect for 5 more seconds. Very strong effects that can greatly help your teammates at the end of the match. This perk can be used, for example, if the killer has hooked one of your teammates and is camping. You can either trade or unhook them together, even in a group of three. The unhooked survivor receives massive bonuses similar to the “Nanny” perk, giving them a 100% chance to escape the match. The only condition is surviving until the end of the match, as if only two or three survivors remain, the effect may not be as impactful.
PLOT TWIST
When you’re in the injured state, you gain the ability to lie down on the ground, and after fully recovering you completely heal and get a significant Haste boost for a short time. It sounds pretty funny. With this perk you can heal yourself and also get a nice speed bonus. It’s useful when survivors currently can’t heal you, or when you use it in a very hidden spot where the killer is unlikely to find you. It can also help at the end of the match if the killer closes the hatch or you’re the last survivor left, still injured.
OVERCOME
Your increased movement speed after the killer hits you lasts for a few extra seconds, causing Exhaustion. This allows you to create much more distance from the killer than usual, slowing down the chase. You can also use this perk, for example, against The Ghoul, who becomes very slow after a tentacle strike, allowing you to break away significantly. Overall, the perk is helpful, but it only works after any killer hit.
DANCE WITH ME
When you vault over an obstacle, your scratch marks disappear for a short time. Sounds pretty cool — when you jump through a window, for example, the killer won’t immediately know where you ran because your scratch marks won’t show. But if the killer is experienced, this perk won’t help you much.
POTENTIAL ENERGY
When repairing a generator, you gain the ability to store energy up to 20%. You can spend this energy to add the corresponding amount of progress to the generator. The perk is basically useless during normal repairs because it gives you no real benefit, but it can be used on more important, high-pressure generators so the killer has fewer chances to control them. For example, you can save enough stacks and use them on a crucial generator in a tough match. The perk also lets you instantly remove regression by adding progress back. It won’t always be useful, but in a 3-gen situation it can definitely help.
WE'RE GONNA LIVE FOREVER
You are able to heal survivors in the dying state twice as fast as usual. When you pick them up, they gain Endurance for 10 seconds. This perk can be especially useful near the end of the match when the killer starts slugging your teammates. If you manage to heal a downed survivor in time, they’ll be protected from a hit for a short duration, giving them a valuable chance to escape, reposition, or continue the objective. In tight situations, this extra time can completely shift the momentum of the game, allowing your team to stabilize and prevent a full wipe.
BADA BADA BOOM
After you hit 20% gen progress, the perk activates. You can plant a bomb on any window that stays active for 60 seconds.
If the killer vaults that window, they get –50% movement speed for 6 seconds.
This looks like a pretty insane and aggressive anti-killer strat. The perk shines even more in specific combos and can seriously tilt the killer. It basically lets you gain huge distance in chase, and even window-focused / vault builds will suffer hard after going through that trapped window.
Great tool for chase control and mind games
WELL MAKE IT
When you unhook any survivor, you activate the perk for 90 seconds. While active, you can heal your allies 100% faster. A very strong and simple effect that allows you to heal your teammate much quicker before the killer arrives or to get back to your tasks faster. Especially useful in healing-focused builds.
FIXATED
Your walking speed is increased by 20%, and you can see your own scratch marks.
This allows you to move stealthily across the map faster, helping you hide before the killer notices you. You can also see your own tracks to understand how they appear and cut them off when needed, which can be useful.
The increased movement speed also helps you feel more comfortable during chases or when using a flashlight, giving you a better chance to land a blind.
FOGWISE
On a great skill check, reveals the killer’s aura for a short time. Works almost like the "ALERT" perk, but its activation is slightly more difficult. It can only show the killer’s aura when, for example, you are repairing generators, healing, etc., so it provides no advantage during chases. Its effectiveness also depends on how often you hit great skill checks; if you are an experienced survivor who frequently hits them, the perk can reveal the killer’s aura well. If not, the perk is questionable.
LIGHTWEIGHT
Your scratch marks are harder to read and disappear significantly faster than usual. A cool perk for stealth, allowing you to move quickly and quietly in certain areas. It is not very effective during chases.
PLUNDERER'S INSTINCT
You can see the aura of chests and items within 64 meters of yourself. When opening a chest, increases the chance to find something rarer by 50%. A decent skill that helps you understand where chests are located and loot more expensive items from them, which can sometimes be profitable.
QUICK AND QUIET
This perk lets you massively reduce the noise you make when interacting with objects (except gens), keeping the killer from noticing you. The perk has a 15-second cooldown. It can let you vault quickly without leaving any notification sound, which can be useful in certain situations. You can also use it for stealth builds or for locker mindgames to confuse the killer about where you went.
DRAMATURGY
When healthy, you can activate Dramaturgy to briefly lift your legs and gain 25% Haste for 2 seconds. After the speed boost, you receive a random effect such as: a scream, 12 seconds of Endurance loss (Vulnerability), double Haste, or a new item with add-ons. Dramaturgy causes 40 seconds of Exhaustion and cannot be used while Exhausted.
This is a very specific perk that can grant you various effects that may help in certain situations. However, use it wisely — while lifting your legs you slightly slow down, which can be critical if the killer is too close, and after activation you might receive the Vulnerability effect, making you easy prey. Use it only when you know what you're doing.
BLAST MINE
After repairing 40% of a generator’s progress, you gain the ability to place a Blast Mine on it for 120 seconds, and the generator becomes yellow for everyone. When the killer damages that generator, all Survivors and the killer near it are blinded, and the killer is stunned for 4 seconds. After that, the perk deactivates.
It’s a pretty annoying perk for the killer, as it can waste a good amount of their time when they try to kick a generator. However, it doesn’t save enough time for you to fully complete another generator or objective. There are also situations where the killer can effectively guard their generators, making the Mine hard to use. But for more consistent value, you can place it on high-priority generators to interfere with the killer’s defense.
STRENGTH IN SHADOWS
You can heal yourself without a med-kit while in the basement. After finishing the heal, you see the killer’s aura for a short time. It’s a very cool and strong ability, but unfortunately not every map has basements where you can make use of this bonus. Additionally, being able to read the killer’s aura is always nice. The perk is especially useful on maps where basements are more favorable for you.
BOON: CIRCLE OF HEALING
Grants you the ability to bless Totems and provide positive bonuses. When you bless a Totem, you create a boon that lets all Survivors heal faster within a large radius. You can also see the auras of injured Survivors who are close to the Totem.
It’s a pretty interesting perk, giving strong bonuses to all Survivors at once and allowing much faster healing. However, it has some drawbacks, mainly its limited radius — you need to stay relatively close to the Totem to benefit from it. Also, the killer can snuff the Totem, removing your boon entirely, forcing you to bless it again or find another Totem.
INNER FOCUS
When interacting with a totem, you charge a perk that can heal you if you stay inside a locker for a short time, after which the effect expires. It’s a decent perk that allows you to heal yourself, which can be useful in certain situations.
However, you spend a lot of time finding the totem, cleansing it, and then hiding in a locker — time that could often be saved by simply having a teammate heal you instead.
In situations where your teammates are dead or completely unable to help you, the perk can become genuinely useful.
TROUBLESHOOTER
When you are in a chase, you can see the aura of the most progressed generator, and you also reveal the killer’s aura when you drop a pallet. The effect can persist for a short time after the chase ends.
Overall, the perk is pretty good — it can help you during a chase and let you know which generator is currently “hot,” so you don’t lead the killer toward it. You can also see the killer’s aura whenever you drop a pallet, which is very useful.
The downside of this perk is that it only works during a chase. It can’t show you any information when the killer isn’t actively chasing you, which makes it feel not very strong in some situations.
TIME FOR YOURSELF
You are able to take one hook stage from a survivor who is currently hooked, giving them the chance to hang for an additional stage. In return, you gain the Exposed status effect for a short time.
It’s a pretty interesting perk that lets your teammate survive longer in the match, which is definitely useful. However, you also give yourself one hook stage, meaning you can only stay on the hook for one stage before dying. On top of that, you become Exposed and scream, which the killer can take advantage of and decide to target you instead.
CHEMICAL TRAP
When you have repaired the generator by 20%. You get the opportunity to set a trap on a dropped board that can significantly slow down the maniac upon contact with it. Sounds very cool and strong since you will save a lot of time in the chase. But the killer will most likely not strive to destroy such pallets knowing that he will get a penalty. You can set traps in safer structures where you force the killer to break the board and activate the trap.
POISED
When a generator repair is completed, your scratch marks are suppressed for 30 seconds. Upon your first interaction with a generator, you see the Killer’s aura for 8 seconds. This can help you stay more stealthy against the Killer, especially during a chase where they may lose you, though not always. You can also see the Killer’s aura to immediately understand who you are playing against. Despite the effect being quite inconsistent, it can sometimes catch the Killer off guardс.
DO NO HARM
For each hook stage a survivor has gone through, you can heal them significantly faster. Overall, this is a pleasant effect that allows you to quickly heal a survivor after they are unhooked. The additional bonus for great skill checks is also decent.
However, the perk speeds up healing only for your teammates, not for yourself. Unlike Botany, which always gives a consistent 50% bonus to healing and self-healing without conditions, this perk works only when the survivor you heal has already been hooked.
You also won’t be healing survivors from second or third stages that often in most matches, so the perk’s value is limited. It ends up being situational and rarely shows strong impact.
GHOST NOTES
When you are affected by Exhaustion, your scratch marks fade twice as fast. Your Exhaustion also recovers slightly faster. This is quite an interesting perk that can be combined with other Exhaustion perks to gain shorter scratch marks and reduced Exhaustion time in return. It won’t be very effective in a chase, but the bonuses are still nice to have.
DELIVERANCE
When you unhook any survivor, you gain the ability to free yourself from a hook the next time you get hooked. This is a pretty cool perk that can help you a lot in difficult situations or late-game scenarios, but it has its drawbacks.
There’s a chance you might be the first one to get hooked, in which case the perk becomes completely useless for the rest of the match. Also, after you unhook someone, you receive a long-lasting debuff that prevents you from fully healing before your next hook, which can put you at a disadvantage.
However, the perk can be extremely valuable in situations where the killer has downed almost everyone. You can use the perk to unhook yourself and try to save your teammates, denying the killer an easy win.
WICKED SENSE
When you are unhooked, the killer’s aura becomes visible to you. You also gain a 100% chance to free yourself from the basement hook. These bonuses sound quite appealing, but the chance that the killer will actually carry you specifically to the basement is extremely low. Because of that, you won’t be able to make use of the guaranteed self-unhook in most matches.
There is still the other bonus — seeing the killer’s aura for a long duration — which can be consistently useful. However, the perk’s overall value relies heavily on rare conditions, making it unreliable and not very consistent in practice.
DESPERATE MEASURES
When any survivor is injured, hooked, or dying, your healing and unhooking speeds increase. The bonus grows for each survivor in one of these states. It seems very useful for fast healing when multiple teammates are in trouble. However, since it only activates when someone is injured and the bonus itself isn’t very large, it becomes less effective compared to something like Botany Knowledge, which doesn’t nearly double the speed but works at all times.
This perk is mostly useful against killers who can deal rapid hits to survivors.
FLASHBANG
When you reach 40% generator repair progress, your ability charges. Entering a locker lets you craft your own flashbang grenade, which you can throw to blind everyone in a small radius and even stun the killer.
It sounds very fun and cool — you get a grenade you can throw anywhere. It can be used to save a teammate from the killer’s shoulder (though you need slightly different timing because of the delay). If you know how to use it, it can help you a lot.
EMPATHIC CONNECTION
Now injured survivors can see your aura, and you can heal those injured survivors faster than usual.
This perk could help your teammates by making healing easier or providing some other support. However, survivors don’t often feel motivated to come specifically to you to be healed. The aura itself doesn’t give them any real reason to approach you, especially if other survivors are nearby.
The healing speed bonus also applies only when you are healing others — it does not speed up your self-healing.
Because of that, the perk is rather questionable, since these two effects provide very little actual value.
STREETWISE
When any of your items runs out of charges, you temporarily gain the ability to see the killer’s aura. If you obtain a new item from a chest, its charges are significantly increased.
Overall, the effect is solid — it can extend the usefulness of your items for a longer time, such as toolboxes, flashlights, or keys. You also gain aura-reading, which can be useful in a chase, for example when your flashlight burns out and you suddenly get valuable information.
It’s a shame that the item you replace no longer receives bonus charges like it used to.
LUCKY STAR
When you enter a locker, you can see the auras of nearby survivors and the closest generator, and your grunts of pain and blood pools are suppressed for a long duration. The perk has a cooldown.
It sounds good on paper, but you already know where the nearest generator is — you just need to look around a bit. As for seeing your teammates’ auras and suppressing your sounds, those are nice perks that can be useful, but all of these benefits are temporary. You’ll have to keep re-entering a locker after each cooldown to activate the effect again.
UP THE ANTE
When your teammate gets hooked, you gain 3 tokens (up to 9 max). Hitting a great skill check consumes all tokens and for each one you reduce the gen charges by 2 — basically juicing the gen progress.
It’s pretty solid for locking down a key gen or setting up a strong 3-gen, since you’re slowly dumping those bonus charges into progress. But the main way to get tokens is your teammates getting hooked, which makes the perk kinda limited, and overall you’re only repairing a bit faster most of the time.
Still, in clutch moments this perk can реально pop off — letting you slam the last gen way faster and potentially turn the game around in endgame.
INNER FOCUS
You can see the scratch marks of your teammates. When the killer hits a survivor, their aura is revealed for a short time. With this perk, you can locate nearby survivors through their scratch marks, which can be useful. Additionally, the killer’s aura can provide valuable information, but it only activates after a hit. Overall, the perk can give you decent information about both survivors and the killer.
BOON: SHADOW STEP
Grants the ability to bless totems, providing positive bonuses. When you bless a totem, it allows you to perform a safe dash and prevents both you and nearby survivors from leaving scratch marks within the totem’s radius. This can be quite useful, as the totem helps you move through structures without worrying about leaving scratch marks. However, it only works within a limited radius, so you can’t always take advantage of this bonus despite its short duration. If the killer is experienced in chases, they are unlikely to lose sight of you just because of the absence of scratch marks. Additionally, the blessing does not hide your blood trails, which clearly indicate your direction. Like the healing circle, this blessing can also be extinguished, requiring you to bless the totem again.
STILL SIGHT
When you stand still, you can see the auras of chests, generators, and even the killer. The effect disappears as soon as you start moving. Aura reading is certainly useful, but there is one catch: you need to remain stationary for some time to activate it, and the effect ends immediately if you take even a small step. Seeing the killer’s aura is particularly strong, especially during a chase. You could stand in a checkpoint and observe the killer’s movements to navigate more easily. However, this doesn’t always work, as you might not have the chance to stay still for a few seconds—most likely, the killer will already be close to you.
WAKE UP
You can see the auras of the exit gates. Survivors can see your aura when you interact with them. You also open gates faster for each other survivor still alive. This effect sounds quite useful, as it allows your teammates to know which gate you’re opening and open them significantly faster. However, aura reading isn’t always that helpful, since other survivors might open different gates without any risk. You also already know the gate locations because interacting with them gives you a long prompt, making the aura almost meaningless. Additionally, the speed bonus depends on how many survivors remain in the match. If only two of you are left, or you’re alone, the bonus won’t be very significant. You also might not survive until the end of the match, making the bonus even more questionable. Overall, if you’re alone and the killer has closed the hatch, you can still manage to open the gate you need and escape.
BOIL OVER
You are able to struggle against the killer on your shoulder much more effectively than usual. Additionally, if the killer falls from any height, your current escape progress increases. This perk can be useful on taller maps with elevated structures, where the killer has to jump, thus increasing your escape strength. However, in practice, the perk provides only minor help—it can effectively shake the killer, making it harder to hook you, but it doesn’t give any significant advantage.
WIRETAP
When you have learned 40% of the generator progress, the opportunity opens to place a bug that can detect the killer in a small radius of action. The bug's operating time is limited but long, immediately resets its work when the generator is kicked. Looks quite good in the condition if the generator will be close to structures or something similar. The radius of action is quite insignificant but it can help in some moments.
SELF-PRESERVATION
When your teammate gets hooked, you gain effect Elusive for 30 seconds. It’s a pretty sneaky perk that lets you play it safe and avoid getting caught by the killer, which can реально save your life.
But tbh, most of the time it’s kinda situational and not always worth relying on every game. Still, you can combo it with other builds to confuse the killer and make them lose you in chase.
SECOND WIND
When a survivor is picked up onto the killer’s shoulder, you gain a significant speed boost for a long duration, after which you become Exhausted for a while. This perk can still work well for altruistic players who want to quickly save a teammate with a flashlight or drop a pallet to stop the killer. The perk also remains active for a short time after the pickup, allowing you to reposition yourself somewhere useful on the map. It used to grant a 200% movement speed boost, which made it extremely strong for altruistic plays.
FLOW STATE
For each completed generator, you gain 1 token.
Each token increases the speed of unhooking teammates, healing others, self-healing, and cleansing totems by 10%.
This perk is similar to Fire up, gradually making you stronger over time. Despite the relatively small bonuses, faster self-healing and unhooking can feel really nice, especially when the killer is nearby and can’t hit you on normal timing.
In hex-oriented builds, the cleansing speed bonus can also matter, especially when combined with perks that rely on totems, giving it some extra value in those setups.
SMASH HIT
After using a pallet to stun the killer, your movement speed increases sharply for a short time, causing a slight Exhaustion. It seems like a pretty good choice if you can time your stuns well, especially when the killer is rushing at you. By stunning them, you can gain a significant amount of distance, making the killer consider giving up the chase.
SELF-CARE
You can heal yourself on your own even without a med-kit, but the healing speed is penalized. It’s a very strong ability that lets you heal without relying on your teammates, but unfortunately the healing penalty is very large, and fully healing yourself takes 45 seconds (without considering other speed modifiers).
DETECTIVE'S HUNCH
When any generator is completed, you can see the auras of generators, chests, and totems within a large radius for a long duration. Overall, it provides good information for some survivors if they really need to cleanse totems or find chests. But for others, this aura won’t be very impactful since they already know where most generators and chests are located. The perk can help reveal the aura of totems that might contain a Hex, but it’s picked rather rarely for that purpose.
SOLE SURVIVOR
For every survivor killed, you gain a token. Each token can limit the reading of your aura up to a distance of 72 meters. If you are alone, you can repair generators and open gates significantly faster. It sounds like a decent perk that prevents the killer from reading your aura with their perks. And if you survive until the gates, you have a good chance to escape due to the increased gate-opening speed. Like all perks of this type, it can’t be used all the time.
BETTER TOGETHER
When repairing any generator, its aura manifests for each of your allies. When the killer downs a survivor, you can see the aura of the remaining survivors for a long time. A decent skill that can tell survivors where you are repairing, which sometimes they can join you in repair. The aura of survivors is also useful but you don't really need it if you are currently repairing the generator.
EMPATHY
You can see the auras of injured teammates within a large radius. It’s a pretty simple positive effect that gives you information about where survivors are and provides an opportunity to heal them.
PHARMACY
You can open chests extremely fast while making almost no noise, and when you open one, you receive a blue med-kit. This perk is useful when no one is available to heal you, giving you a guaranteed med-kit so you can heal yourself. However, most of the time your teammates can heal you quickly, which makes the perk not very necessary overall.
CAMARADERIE
When survivors are within 16m radius of you while you are on the hook, your hook progress is paused for 34 seconds. The skill can be useful against camping from the killer, it prolongs this process giving time for your rescue. But camping doesn't occur very often in matches.
STAKE OUT
When you are inside the killer’s terror radius, you gradually gain tokens. Each token guarantees a Great Skill Check and gives an additional +1% bonus. This perk can be useful for repairing generators, as consistent Great Skill Checks provide strong value, especially against killers like The Knight. It's also helpful for beginners who still struggle with hitting Great Skill Checks.
The downside is that you must stay close enough to the killer to slowly gain tokens. Against killers with a small terror radius or those who are Undetectable, it becomes much harder to build them up. Overall, the perk isn’t really worth a slot in your build, since there are much more effective perks for repairing or healing.
WE SEE YOU
Whenever the killer sees your aura, you gain 1 token. There is a 10-second cooldown between gaining tokens. After accumulating 4 tokens, you and your teammates can see the killer’s aura for 15 seconds.
This perk can help with tracking the killer and giving information to your teammates. However, the bonus doesn’t trigger often enough to really compete with the killer’s information perks, considering the long and conditional activation requirements. It’s usually better to run other information perks that reliably reveal auras instead.
SECOND WIND
The skill can work with just one healing from your teammate. When you are taken off the hook, you get a debuff but can heal yourself after 20 seconds. The skill works roughly the same as a blood syringe which can heal you automatically even while walking. Overall, a cool skill that can save you from wasting time on regular healing.
DISTORTION
At the start of the match, you have 1 token. Each token allows you to hide your aura and scratch marks when you spend it. During a chase, you can generate additional tokens (up to 2). This is a very interesting effect that makes you immune to aura-reading. However, it can only activate once at the beginning of the match if the killer has constant aura-reading, which still reveals you. To replenish your tokens, you need to enter a chase with the killer, and you can build up to 2 tokens. Newly gained tokens can also be used during chases, making it harder for the killer to track you.
RESIDUAL MANIFESTATION
When you open a chest, you can search it to get a green flashlight. When blinding the killer in any way, he gets blindness for a long time. This skill can confuse the killer about where generators and hooks are located. Additionally, he won't be able to see your teammates' auras which is definitely a plus. However, the effect is temporary, and it may not greatly hinder the killer from seeing everything again. Also, when searching, you get the weakest flashlight without upgrades, which might have been something more valuable than this.
URBAN EVASION
While crouching, your movement speed is increased by 100%. This can be used for reliable stealth to reduce the chances of the killer spotting you, allowing you to create a larger distance from them. However, the effect is short-lasting and cannot always be practical in matches.
ROAD LIFE
When you are injured, you can pass several reaction checks to activate the skill. Your healing is produced twice as fast until you stop healing. A skill that can reduce your healing time conditionally by two times which is quite useful. However, you will need to pass 6 excellent reaction checks which makes its implementation difficult, but anyway the skill can sometimes be useful.
CHANGE OF PLAN
You start the match with 2 tokens.
By entering a locker while not holding a toolbox, you can transform your current item into a med-kit of the same rarity.
The perk has a 100-second cooldown.
This can be situationally useful, especially against strong killers who can land hits easily, when having a med-kit can save you. However, in many cases, without this perk you could’ve just used your original item after the killer leaves, which can make this perk feel a bit redundant or unnecessary in some situations.
REACTIVE HEALING
When you are injured and the killer hits a survivor near you, you restore 50% of your missing health (this happens every time). It sounds pretty interesting. You can use it on smaller or more enclosed maps to slowly build up healing progress. However, this perk is mostly taken for fun rather than serious play.
ACE IN THE HOLE
When opening a chest, more valuable items will drop for you with one strong upgrade and a second almost as good. Looks like a pretty fun offer, when using the skill to get expensive items for you (they are saved after the match). But it can only be used from chests. From it you can get a purple toolbox, flashlight or something else that can really help you. However, the ace doesn't give the strongest advantage.
DUTY OF CARE
When you get hit, all survivors within a short radius gain a strong Haste effect for a few seconds. This perk can help protect your teammates from follow-up hits: when you take a hit for them, they can quickly pull away, forcing the killer to consider switching targets. However, the perk is purely altruistic and only helps your teammates, not you.
SABOTEUR
When the killer picks up a survivor, you can see the auras of hooks within a very large radius. You can also sabotage those hooks at increased speed. The perk has a long cooldown.
This perk can help your teammate by allowing you to sabotage the killer’s key hook so they can’t be carried to it. The most important part is doing it carefully, since the killer can easily down you if you misplay the sabotage timing.
You can also see the killer’s Scourge Hooks (highlighted in yellow), which gives you useful information about perks like Pain Resonance or Gift of Pain. However, this perk fits more into an altruistic build, and it’s not guaranteed that you’ll always be able to make good use of it.
APOCALYPTIC INGENUITY
After opening two chests, you gain the ability to create a fragile pallet in any place where a real pallet once stood. When you drop it, it breaks instantly. It’s a fairly decent ability that lets you create your own pallets. Even though they are fragile, you can still buy some time if the killer is afraid to get close because of the potential stun. Unfortunately, to activate this perk you need to open or search two chests, which feels slow and inconvenient, making the perk not very strong overall.
BORROWED TIME
You can greatly increase the duration of Endurance and Haste for the teammate you unhook. It looks like a nice extra boost that can always be useful, but the Endurance status can be lost if the survivor performs certain actions, which often makes the bonus Endurance ineffective.
In theory, this perk can save your teammate from possible tunneling by the killer, but the Babysitter perk does that job much better.
SOLIDARITY
When you heal a teammate, you heal yourself for 70% of the progress you give them. This perk can be useful during heavy pressure from the Killer. However, in most situations it ends up being weak, since you won’t always be injured for it to provide any real value.
EXULTATION
When you stun the killer, you can add +75% charges to your item and upgrade its rarity. Exultation has a long cooldown. This perk looks more fun and amusing than serious. However, the effect lets you greatly extend your item’s duration and even upgrade its rarity, which gives you additional seconds of item usage — and that can be useful.
BARDIC INSPIRATION
You are granted a guitar that you can play. At the start of the game, you are given a random number from 1 to 20. 1 token - you simply scream. 2-10 tokens allow you to increase progress through skill checks by 1%. 11-19 tokens increase the bonus to 2%. 20 tokens increase it to the maximum of 3%. The perk's duration and cooldown are one and a half minutes. A very interesting ability that can sometimes come in handy. Note that the additional bonus is also given during successful skill checks, allowing you to repair generators or heal slightly faster. The effect can also spread to your allies within a small radius.
BLOOD RUSH
When you are taken off the hook, the skill is active for a certain time. You can automatically remove exhaustion from yourself. DOES NOT work when powering gates. Can be combined with other exhaustion skills to use it twice which will help you pull through very strongly. Keep in mind that it can deactivate with any of your activities. The skill can also be used against tunneling, for example with Sprinter which will allow you to speed up already for six seconds instead of three.
TEAMWORK: FULL CIRCUIT
For each survivor working on a generator, the skill check success zone increases by 25%.
When you repair with another survivor, your repair speed is increased by 5%.
This perk makes Great Skill Checks much easier to hit, but honestly that part isn’t very impactful. The repair speed bonus is also pretty small, so it doesn’t really change the pace of gen repairs in any meaningful way. Overall, it’s nice QoL, but nothing game-changing.
LUCKYBREAK
When you are hit, you can leave scratch marks and blood pools for a long time. The effect doesn’t get consumed when you heal yourself. For every second you spend healing a teammate, you add an extra second to the perk’s duration. It’s a fun perk that can slightly confuse the killer about where you went, and you can reuse it by healing someone again. However, against experienced killers, the perk won’t help you much.
METTLE OF MAN
When you turn your back to your teammate 3 times, the perk charges. While active, you cannot be put into the dying state. When you heal, your aura becomes visible to the killer within a 12-meter radius. This perk can reward your excellent altruism by giving you resilience and preventing you from going down. However, to activate this perk, you need to intervene in a chase with your teammate and the killer three times, which requires additional time spent healing and turning your back repeatedly, taking up a lot of time.
DECEPTION
When you’re near lockers, you can activate the perk. While it’s active, your scratch marks and other traces disappear for 5 seconds, and the locker doors slam, creating a noise notification. The trick has a 15-second cooldown. This perk can sometimes confuse the killer into thinking you jumped into a locker, making them waste time checking. However, against experienced killers, it’s unlikely to fool them, even with its short cooldown.
BOON: DARK THEORY
This perk grants the ability to bless totems while giving positive bonuses. When you bless one of the totems, you create a chime and give all survivors a 3% Haste effect. The effect ends after leaving the totem’s radius. It seems like an interesting effect that can help you during chases against the killer. But since it’s a Boon and therefore limited, it cannot provide a strong advantage. It’s best to place it in the center of the map or inside the main building so it gives more value in loops. However, the killer can simply snuff the totem, and the effect will automatically disappear.
A PLACE FOR US
While healing a teammate, both of you gain the Elusive effect for the duration of the heal.
If you heal the Obsession or they heal you, the effect lingers for an extra 30 seconds after the heal is completed.
On its own, this basically guarantees a completely silent heal with no grunts, giving you a good chance to stay unnoticed by the killer.
That said, healing right next to the killer is still a bad play — it’s way better to rotate to a safer spot and avoid getting pulled into a chase.
Also, the bonus Elusive duration only works when interacting with the Obsession, which makes it less consistent since you won’t always find them when you need it.
CLAIRVOYANCE
When you cleanse or bless a totem, you can see the auras of generators, hatches, hooks, exit gates, and chests within a 64-meter radius. While the perk is active, a button appears that lets you reveal these auras, but the maximum duration of the effect is 12 seconds. It’s quite a powerful effect that provides a good amount of information, which can be very useful. The most important part depends on the match outcome — the hatch aura can be especially valuable, especially since you can see it within a very large radius. The auras of other objects aren’t as important since they’re usually easy to locate on your own. The perk is also limited, and you’ll need to find another totem to refresh its effect, but the aura information you get is still a nice bonus.
MOMENT OF GLORY
The perk activates after you open or search a chest twice. When you get hit, you automatically heal yourself over 60 seconds, but you become Weakened during this time. This perk can help you recover your health state and extend a chase much longer. However, because the activation time is very long, the perk rarely works in real matches, since you usually get hit before it can activate.
You also need to find a chest somewhere and spend time opening and searching it (unless you have another perk that speeds up searches). If not, you’ll need to find another chest, which wastes even more time. Because of these conditions and the long activation timer, the perk isn’t really viable.
MIRRORED ILLUSION
When a generator reaches 20% repair progress, you can activate the perk. You can place your own illusion on an exit gate switch, a generator, a chest, or a totem for 60 seconds. It may seem like the perk could confuse the killer into thinking it’s actually you. But unfortunately, your illusion emits very noticeable mist when viewed up close, which makes this kind of disguise almost useless.
BREAKDOWN
When you are taken off the hook, you see the killer's aura for 6 seconds. With any removal from the hook, you can break the hook you were hanging on for 180 seconds. This skill can destroy the killer's hooks which can be a very strong help against him. However, you can break such hooks about 3-5 times which doesn't lead to a tough situation for the killer or anything else. Also, the duration and frequency of the aura is maximally small to prove something.
UP THE ANTE
You can increase your chances of getting off the hook by 3% for each living survivor. It’s a useless effect that can technically give you a chance to escape during the first stage, but it’s very unpredictable. By the way, keep in mind that it allows you to attempt escaping by yourself, which can make the endgame slightly faster.
FRIENDLY COMPETITION
When you repair a generator together with another survivor, you gain a 5% repair speed bonus on other generators for 120 seconds. This perk can fit a gen-rush playstyle that can pressure the killer. But the extra speed is too small to make a real impact in most matches, and in many games you’ll end up repairing generators alone, making the effect useless.
OPEN-HANDED
You can increase your aura-reading range up to 16 meters. This perk can be used for special auras, either from a key or other perks, to give yourself significant bonuses. For example, you can use it with Bug or Blood Pact, and the effectiveness of such aura readings will be much greater. It can only be combined with similar items or perks, because on its own it is completely useless.
BETTER THAN NEW
When you perform healing on your teammate, he gets a 16% bonus to healing speed, opening chests and cleansing totems until he gets hit. Looks like a pretty interesting chain. Since the 16% speed bonus can only work until hit, this makes the bonus extremely doubtful. To compare, for example, healing speed, it's better to use Botany, Empathy or some other skills. All this effect is transferred only to the survivor's pre-main activities, not to the generator as it was before. Since the skill is additionally considered altruistic, it loses the meaning of its benefit.
FLIP-FLOP
When you are dying, all your 50% recovery turns into 50% wiggle progress. In normal matches, this effect is not applicable since if you recover while the killer hits you for about 3 seconds, you get a bonus to wiggle progress of only 4-5% which is unlikely to help you. This skill can significantly help you if the killer slugs you for a long time and you manage to recover 95% of your recovery progress to 47.5% to wiggling. You can also use wiggling in some builds with increased recovery speed which is fun to play with.
ROOKIE SPIRIT
When you hit 3 skill checks, the perk activates. You can see the aura of any generator that is currently regressing. It’s a decent perk that helps you stay informed about the state of generators. However, since the killer is usually near a regressing generator, you won’t be able to approach it safely.
This perk can hint that an important generator is losing progress and needs to be fixed. But you can just repair other generators instead, knowing the killer is focused on that one. You can also tell whether a teammate is repairing it if its aura disappears.
Overall, the perk isn’t worth a perk slot, since you can often remember generator locations on your own.
BOON: EXPONENTIAL
You gain the ability to bless totems and provide positive effects. When you bless a totem, it creates a chime and grants survivors the ability to pick themselves up from the dying state. Your own recovery speed is increased by 100%.
The boon’s effects are very strong and can work extremely well in the right situations. However, because the boon has a limited radius, these bonuses won’t always help you consistently throughout a match. In most cases, the killer will pick you up immediately after downing you, preventing you from taking advantage of the effect.
If the killer leaves you on the ground, the boon can be very useful — but that doesn’t happen often.
TEAMWORK: COLLECTIVE STEALTH
When you heal an ally, both of you within a 16-meter radius have your scratch marks and blood trails hidden. The effect lasts a few seconds even after leaving the radius.
This perk is more suitable for running together with a friend against the killer without leaving any traces. However, the condition and the effect itself are rather weak and won’t provide any serious advantage.
INVOCATION: WEAVING SPIDERS
You can approach the basement and perform your own ritual there for 60 seconds. While performing the ritual, other teammates can join you. Upon completing the ritual, you add 10 charges to each generator, and the effect remains active as long as you are alive. In exchange, you sacrifice your entire health status for the duration of the match.
A decent ability that lets you perform a ritual and gain a nice bonus, but you pay with your health, making it much easier for the killer to chase you. If you really want to try out this skill, that’s up to you.
SPECIALIST
For every chest you open/search, you gain a token (up to 6). For each token used during generator repair, you reduce its charge by 4% per token. This perk can potentially speed up any generator repair and be useful, but there’s a catch. To make it work, you need to keep finding and opening chests to earn tokens. To have all tokens, you need to locate at least 3 chests, which can be scattered anywhere. Essentially, you spend much more time gathering tokens than actually repairing generators faster. Yes, during repair it can reduce charges by up to a quarter, but at what cost? Moreover, if your teammates also take this perk, there may not be enough chests on the map for everyone to use it, showing that the condition isn’t as simple as it seems. This perk could be high-tier if it gave more tokens per chest.
OVERZEALOUS
When you cleanse any totem while healthy, your repair speed increases by 10%. If you cleanse a cursed totem, the bonus is doubled (the bonus lasts until the killer hits you). This add-on can help you repair generators faster, especially if your teammates are nearby. However, it only works while you’re healthy, which makes activation more difficult. Additionally, the effect applies only to generator repairs, not chests, healing, or other actions. Although the bonus can be significant when interacting with a cursed totem, killers rarely take it, making this strong bonus situational.
TEAMWORK: POWER OF TWO
When you heal an ally, both of you within a 16m radius receive a 5% Haste effect. The bonus lasts for 4 seconds after leaving the radius (so you can regain it by coming close again). Decent ability, but as mentioned, it’s kind of silly to constantly stay near your ally just for the effect. In a chase, it can be slightly useful against the killer, but unfortunately, you’ll have to keep running with your teammate for the Haste to work.
SCAVENGER
When your toolbox runs out, you can restore it yourself by performing 5 Great Skill Checks. Upon successful restoration, your repair speed is reduced by 50% for 30 seconds. A very strong perk that can preserve your toolbox for reuse. However, after using it, the repair penalty is too high, preventing you from repairing generators effectively.
EYES OF BELMONT
When repairing a generator, you can see the killer's aura for 3 seconds. You can extend this aura visibility by an additional 2 seconds. The aura effect is fairly small and rare, providing limited information. However, this perk can be combined with other aura perks to reveal the killer’s aura for a slightly longer time. The most effective use is in open play, which can significantly increase the killer aura’s range.
VISIONARY
You can see the auras of generators within a 32m radius. This perk has a 16-second cooldown after repairing a generator.
Knowing the location of generators in advance is useful, but you can usually figure out their position by the flashing light on top. Also, generators can appear in different structures, making their aura not particularly necessary.
Overall, this perk is more suitable for beginners who don’t yet know where generators might be.
AFTERCARE
When you heal any survivor, perform joint actions with them, get unhooked, or unhook them yourself, you can create a bond with them and see each other’s auras (up to 3 survivors). This is a very interesting perk that provides extensive information about the locations of survivors, which is quite useful. However, to fully activate it, you need to interact with other survivors, which is not always easy. Essentially, the better alternative to this perk is the “Bond” perk, which already allows you to see all survivors’ auras, giving good information without revealing your own location. This perk can be quite informative on the map, but it requires time to utilize fully.
QUICK GAMBIT
When you are in a chase, you can see the auras of survivors. They also receive an increased repair bonus of 5%. This perk is disabled for 40 seconds when you get injured.
This perk can be used to avoid leading the Killer to survivors who are repairing generators. The repair bonus itself is very small and may not have much impact, as the effect ends once you get injured.
DESPERATE STRUGGLE
When you are on the Killer’s shoulder and break free by 15%, you gain the ability to throw a pallet at the Killer to automatically escape.
This sounds like a very strong addition that prevents the Killer from hooking you. However, the Killer usually won’t take risky pallets since other survivors could stun them. Even if they do, there’s often not enough time to activate this perk, making it hard to use effectively.
This perk can be combined with skills that significantly increase recovery speed when downed and with Unnerving Presence or Balance Changes to make it more viable.
BLOOD PACT
When you heal a teammate, both of you gain a 7% Haste effect while within 16 meters of each other. The effect disappears once you leave the radius.
This perk works similarly to Teamwork: Power of Two, but in this case either you or your teammate must be the Obsession for it to activate. You can take this perk for fun to help prolong chases—especially if you combine it with Teamwork: Collective Stealth for an additional 5% Haste.
However, the perk isn’t particularly strong in serious gameplay.
LEADER
Your teammates gain a 30% speed boost to cleansing totems, opening gates, unhooking, and healing. This bonus lasts for an additional 15 seconds after they leave the radius.
Sometimes the effect can be nice, helping your teammates perform actions faster. However, because both the radius and duration are limited, the perk isn’t very strong overall.
BOON: ILLUMINATION
You gain the ability to bless Totems and receive positive bonuses from them. When you bless a Totem, you create a Boon that lets you read the auras of generators, chests, and Totems. Cleansing or blessing a Totem is also performed 10% faster.
This perk provides very useful information for beginners who don’t yet know the locations of important objects. But for more experienced players, the effect may not feel as helpful, since generators are easy to find thanks to their flickering lights, and chests tend to spawn in predictable spots. The aura reading for Totems is mainly useful if you want to place your Boon in a better area or locate the Killer’s Hex to gain a small advantage.
Keep in mind that this is a Boon, and it can be snuffed out on contact, forcing you to re-bless it again.
RED HERRING
When you repair a generator for more than 1 second, the perk activates. The generator becomes yellow, and you can jump into a locker to create a loud noise notification on that generator. Cooldown: 15 seconds.
This perk is designed to distract the Killer and make them check your generator. However, in practice, it doesn’t always work, and the Killer may simply ignore the noise if they’re busy. If you really want to mess with the Killer, you might end up abandoning your generator, which would be better spent repairing instead of trying to lure the Killer over.
ANY MEANS NECESSARY
You gain the ability to reset dropped pallets back to their original position in 5 seconds, and you can see the auras of such pallets. This perk can punish killers who purposely avoid breaking pallets to save time, allowing Survivors to use the same pallet against them again. However, most killers will still break pallets, making the perk mostly useful only for resetting weak looping pallets that aren’t very valuable.
AUTODIDACT
You start the match with –15% healing progress from skill checks, and you are unable to hit Great Skill Checks. For every Skill Check you hit, you gain a token (up to 5). Each token increases the healing progress gained from Skill Checks by 15%, up to a maximum of 60%.
This perk can eventually let you heal very quickly, which is quite nice. However, the perk is rather inconsistent, since you won’t be healing other Survivors often enough to maintain its effect. It also does not work with Med-Kits, meaning the perk becomes useless for self-healing.
LEFT BEHIND
You can see the aura of the hatch within a 32m radius. This perk can help guarantee a successful escape through the hatch in various situations. However, you might not survive until the hatch is opened, which makes the bonus rather questionable.
BUCKLE UP
The perk activates when you heal a Survivor who is in the dying state. You both can see the Killer’s aura, and when the Survivor gets up, their movement speed is increased by 50% and their scratch marks are suppressed for 5 seconds. This perk can partially help the Survivor who just got up avoid an attack from the Killer, which is pretty nice. Unfortunately, this perk is only really usable in the toughest match situations, such as against slugging. It used to be much stronger when combined with For the People, which allowed both of you to instantly gain Endurance for a long duration.
HEAD ON
When you jump into a locker and stay inside for 3 seconds, you can stun the killer standing next to that locker for 3 seconds. This causes Exhaustion for 40 seconds. Does not work while you are exhausted. The perk has a fairly weak effect since it doesn’t speed you up or help you much in a chase. It’s best used in unexpected moments when the killer has no idea where you are.
If you decide to take the risk and jump into a locker, the killer may intentionally wait a bit to bait you, allowing you to stun them for a short time and gain some distance. This perk works best in specific builds or as a way to save a teammate if the killer is currently chasing them.
TEAMWORK: SOFT SPOKEN
For each survivor working on a generator, the repair noise radius is reduced by 25%.
When you repair with another survivor, your repair speed is increased by 5%.
The perk feels pretty weak and unnecessary: the killer will still understand that a generator is being worked on nearby, even on closed maps. And the repair speed bonus is too small to really affect the pace of the game or help much in the long run.
FORSAJ
If you are near your teammate being carried by the killer, you gain 10% Haste, and they start struggling 25% faster. This helps your teammate escape the killer’s grasp more quickly, giving them an extra chance at survival. However, despite these positive bonuses, the effect rarely provides real help (especially if not combined with other perks). In the best case, you might still get hit by the killer even if you try to intervene, even with increased movement speed. If you want to play altruistically, you can use such perks, but in general, it’s better to avoid them.
SOUL GUARD
After you heal while in the dying state, you gain Endurance for 8 seconds. You can stand up on your own if no Hex is affecting you. The perk has a 30-second cooldown. This perk is mainly useful at the end of matches when the killer starts slugging you or if you are the only one in the dying state. For example, a survivor is currently running during a chase and the killer decides to pick you up quickly; usually, the killer will down you immediately after you stand up, giving the survivor much less chance to save anyone. In this situation, you gain Endurance and a speed boost, providing good mobility and a chance to turn the outcome of the game. Keep in mind that you can only stand up with the help of a Hex, which is not present in every match.
COUNTERFORCE
Your totem-cleansing speed is increased by 25%.
After cleansing a totem, you see the aura of the furthest remaining totem for 14 seconds.
For each cleansed totem, your cleansing speed gains an additional 25% bonus (up to +125% total).
This effect is quite strong and allows you to cleanse totems much faster. Since regular totems don't provide much on their own, the perk may seem somewhat pointless. However, this mechanic lets you efficiently track down the killer’s Hex totems, making it a powerful counter against hex-based builds.
DIVERSION
When you stay inside the killer’s terror radius for more than 30 seconds, the perk activates and gives you a stone that you can throw at a certain distance to attract the killer’s attention. It’s a very universal feature that can be used to lure the killer away. However, this is a risky idea — if the killer knows about it, they will immediately realize it’s just a stone thrown into a specific area, and if they actually go to check the noise, you might expose yourself and get spotted. It’s best to use it at the right moments to confuse the killer.
APPRAISAL
At the start of the match, you have 4 tokens. By using a token, you can search chests to find another item, and this action is performed 80% faster than usual. This perk can be used to search for other items, such as valuable or important ones. It can be combined with similar chest-related perks to loot valuable items. However, unfortunately, these perks don’t provide a significant advantage, but they can give you a chance to find something valuable.
CLEAN BREAK
When you heal a teammate, you charge this perk. When the Killer hits you, you receive the Hemorrhage effect, and for 60 seconds, you can heal yourself. It works similarly to Moment of Glory, but with a slightly simpler condition – heal your ally in exchange for a bonus. However, the healing duration for these perks is long enough that it may activate before the Killer’s next hit. It’s best paired with a Hemorrhagic Syringe, which allows you to heal without any conditions in 24 seconds – still long, but much shorter than with this perk.
TOUGHEN UP
When you cleanse/bless a Totem or open a chest, you gain the ability to not scream and additionally see the Killer’s aura for 5 seconds. This perk may not be very useful as it works effectively only against certain Killers. For example, if you get injured and see the Killer’s aura at the start of a chase, it can be helpful. However, unfortunately, this aura can only trigger once per chase due to the lack of preventable screams, which limits its usefulness. The perk can be effective against specific Killer perks or against the Doctor, allowing you to see his aura for almost the entire chase.
ONE, TWO, THREE, FOUR!!
You are given a tambourine to play. While using it, you get constant skill checks that you must complete until the end of the match. Your chance of skill checks is increased by 20% (this effect also applies to your teammates) and lasts 90 seconds. The perk has a 90-second cooldown. A rather pointless perk that doesn’t provide much advantage, only allowing you to hit more excellent skill checks, which gives a small bonus. This perk can be combined with Bard to trigger skill checks more often and gain additional benefits.
LIGHT-FOOTED
Your footsteps become completely silent. When you perform a fast action, the perk goes on a 10-second cooldown. (Does not work while injured.) The perk can be slightly useful for stealth, allowing you, for example, to run silently from the killer if they are close, etc. But because the effect can disappear when vaulting quickly over obstacles and cannot work while you’re injured, the perk becomes very doubtful, simply because the effect itself is very minor.
LOW PROFILE
When you are the last Survivor alive, your scratch marks and pools of blood disappear for 90 seconds. This seems like a very strong effect at first, letting you move around the map very safely. But since it only works when you’re completely alone and activates at the very end of the match, the perk ends up being pretty useless.
TEAMWORK: MODEST VICTORY
When you drop a pallet on the Killer, all Survivors within a 24-meter radius gain Endurance for 10 seconds. This is a rather strange effect that doesn’t really help your teammates in a meaningful way. Moreover, the Killer usually won’t be able to catch up to a Survivor and land a hit before the Endurance ends, which makes the perk feel pointless.
TEAMWORK: TOUGHEN UP
While you are injured, whenever another Survivor within 24 meters of you blinds the Killer by any means or stuns them with a pallet, your scratch marks and blood trails are suppressed for 30 seconds. This effect is also quite strange, since the Killer is usually chasing the Survivor who stunned or blinded them. Only occasionally will the Killer drop the chase and look for a new target, but the suppression of your tracks doesn’t make a very big difference.
CUT LOOSE
When you vault any obstacle, the perk begins charging and lasts for 6 seconds. After every vault, the perk’s duration resets and continues working as long as you keep vaulting. When the perk’s effect ends, it goes on a 45-second cooldown.
It’s a fairly interesting effect that you can use multiple times in a row, which makes it somewhat more flexible than Quick & Quiet, and that’s pretty fun. However, the first vault does not hide your noise, meaning the killer will know you vaulted somewhere. The active duration is also too short to reach another pallet or window for a follow-up vault. And the cooldown is 45 seconds, which is three times longer than Quick & Quiet, making it difficult to justify choosing this perk over Windows of Opportunity.
HYPERFOCUS
For every Great Skill Check you hit, you gain a token. Each token increases your action speed and the chance of triggering Skill Checks, while also boosting the bonus progression from Great Skill Checks by 30%. If you fail to hit a Great Skill Check or stop the action, all tokens are lost.
This is a very interesting perk that provides a gradual increase to Skill Check progression—potentially up to triple the usual bonus. However, to fully benefit from it, you must consistently land Great Skill Checks. Since Great Skill Checks are already difficult to hit, the perk makes this requirement even stricter, which most players won’t be able to achieve. Additionally, the bonus is not very impactful, as it increases progress by only +0.3% per token, up to +1.8% total, which doesn’t offer much real value.
Still, this perk can be combined with Detective’s Hunch and some generator-focused perks to noticeably speed up repairs.
COME AND GET ME!!
When you unhook a Survivor, all other teammates within 24 meters suppress their grunts of pain, scratch marks, and blood pools for 15 seconds. In return, you scream and reveal your aura for 5 seconds.
This perk can partially protect the unhooked Survivor from tunneling, which is definitely a plus. However, you will draw the Killer’s attention to yourself by screaming and revealing your aura for 5 seconds. In most cases, the Killer won’t continue tunneling and will instead switch targets to you, making it slightly easier for them to catch you.
TENACITY
In the dying state, you can recover and move on your own. Your crawling speed is increased by 50%, and the volume of your grunts is reduced by 75%. This perk is mostly useless, as it doesn’t give you any meaningful advantage. In most situations, the Killer will simply pick you up right away, making the perk practically worthless.
It can be used when the Killer is slugging, allowing you to crawl quickly and quietly to a safe area, making it harder for them to find you. This perk can also be combined with Flip-Flop and Power Struggle, or with No Mither and Breakout, making it much harder for the Killer to hook Survivors.
OBJECT OF OBSESSION
Significantly increases the chance of being the obsession. The perk has a 30-second cooldown, after which it activates for 3 seconds. While active, you can see the killer’s aura, and they can see yours, while also giving you +6% action speed. It seems like an interesting perk that provides frequent hints about the killer’s location, which is nice, but keep in mind that they can see you too, making it useful for them as well. In a chase, the perk is almost useless because both of you can see each other’s auras, so it gives an advantage to the killer. Additionally, the extra speed from the perk is minimal and very short, which might help slightly in some situations. Overall, the perk is quite weak, at least compared to other aura-related or obsession chance perks.
CORRECTIVE ACTION
You start the match with 3 tokens. For every successful Skill Check, you gain +1 token. Each token is automatically consumed when a Survivor fails a Skill Check. The token prevents the failure and turns the Skill Check into a Good one instead. You also see the aura of the Survivor who triggered the fail.
This perk can literally help brand-new players who haven’t learned Skill Checks yet. However, once players start paying proper attention to Skill Checks, the perk becomes almost unnecessary. In addition, it cannot save Survivors from difficult or special Skill Checks, meaning they may still fail them regardless.
PARENTAL GUIDANCE
When you stun the killer by any means, you can hide your scratch marks, blood pools, and grunts for 7 seconds. A versatile perk that helps you stay hidden from the killer’s sight, but against more experienced killers with good hearing and awareness, it’s unlikely to work.
PREMONITION
You gain an invisible 45-degree warning cone with a 36-meter range that alerts you to the killer’s location. The perk has a 30-second cooldown. Overall, it’s a weak and mostly useless perk that doesn’t provide reliable killer detection. On top of that, its long cooldown prevents you from using it effectively compared to perks like Alert.
SPINE CHILL
When the killer, without being undetectable, looks in your direction within a 36-meter radius, the perk alerts you and gives you +6% action speed. The effect lingers for another 0.5 seconds after the killer looks away. This is a rather useless perk that doesn’t provide any serious benefit—neither as a warning nor as a meaningful boost to vaulting or repairing. It can be used during a chase, where it may slightly keep you aware of the killer’s intentions or allow you to vault a bit faster, but overall the effect is extremely minor.
BITE THE BULLET
You can perform healing and self-healing completely silently. If you don’t fail a Skill Check, the killer won’t notice it, but you receive an additional 1% penalty to progress. The effect is essentially quite useless—it allows you to heal quietly near the killer, but it’s a high-risk option, and it’s better to heal in a safe location.
SMALL GAME
You have an invisible 45-degree cone with a 12-meter range. If a totem enters this cone, the perk triggers a warning and then goes on a 10-second cooldown. For each totem you cleanse, you gain a token that narrows the cone’s angle by 5 degrees.
This perk is generally quite weak, as it only occasionally detects totems within the cone, giving you a small hint about their location. The shrinking cone becomes less effective with each cleansed totem, which can be seen as a downside — though it also makes the detection slightly more precise. The perk can still be used to help locate and destroy the killer’s Hex totems.
THIS IS NOT HAPPENING
Now your excellent skill check zones are expanded while in the injured state. This can make passing skill checks much easier and often provides a small bonus to your progress. However, the effect doesn’t make a significant difference or provide substantial utility, since even an excellent skill check grants only a tiny progress bonus, and it only activates while injured, making it harder to utilize.
CALM SPIRIT
You gain the ability to avoid scaring crows. Now your grunts are prevented. You can silently cleanse or interact with chests and totems, but your speed is reduced by 30%.
This grants you a useful skill similar to Resilience, which can be used against killers like the Doctor to prevent them from tracking your location, which is great. However, unfortunately, this ability is quite minor in regular matches against other killers; the absence of grunts doesn’t provide any meaningful advantage in most situations.
Additionally, opening chests and totems takes significantly longer, which hinders your progress. In return, you get completely silent actions, but this is rarely helpful, whether near the killer or during most of the match.
TECHNICIAN
When you fail any skill check, the audio cue does not notify the Killer, and the explosion sound is heavily muffled. However, you also lose an additional –3% generator progress.
This perk lets you fail skill checks without giving information to the Killer, which can seem decent for beginners who haven’t fully learned how to hit skill checks yet. But once a player gains enough hours and starts consistently paying attention to them, this perk becomes unnecessary.
On top of that, if you fail a skill check, you lose 8% progress instead of the usual 5%, which only makes your overall gameplay worse.
DEADLINE
When you are injured, this perk slightly increases the chance of triggering skill checks, but they will appear in random positions. The penalty for failing a skill check is reduced by 50%.
This is a very strange perk that makes skill checks even harder for beginners. Even though it increases their appearance rate, that only makes the work more difficult, and the effect works only while injured, giving you practically nothing in return.
However, the reduced penalty for failed skill checks can be somewhat useful against certain killer perks such as Overcharge, Oppression, Hex perks, etc.
REPRESED ALLIANCE
When you repair generators for a total of 45 seconds, you can block generators for 30 seconds.
This perk is designed to counter killer kicks that can damage your generator. However, normal kicks are fairly weak and don’t remove much repair progress. On top of that, you’re left without access to your generator and have to either wait or move to another one, abandoning your active, high-priority gen.
INVOCATION: TREACHEROUS CROWS
You can approach the basement and perform a ritual there for 60 seconds. Other teammates can join you while you perform it. After completing the ritual, you lose one health state, but in return you can see the killer’s aura for 2 seconds whenever they shoo away a crow.
This perk is rather weak and doesn’t provide much real advantage. The effect is not worth sacrificing an entire health state.
RAPID RESPONSE
When you enter a locker, you see the Killer’s aura and become Exhausted for 20 seconds. This perk is quite strange and doesn’t provide much real value. While you can still see the Killer’s aura during the Exhausted effect, it doesn’t make the perk any stronger.
NO MITHER
You have only one health state for the entire match. Your grunts of pain are fully suppressed, and you do not leave blood pools. You also gain the ability to recover from the dying state infinitely, while recovering 25% faster.
These are extremely strong effects that could replace perks like Lucky Break, Unbreakable, or Iron Will. However, you must pay the price of having only a single health state, which you will heavily feel throughout the game. The killer can take you down much faster, which is a major downside.
Still, this perk can be combined with builds that use Buckle Up, Flip-Flop, and similar perks, or with builds focused on breaking hooks.
FOR THE PEOPLE
When you are in a healthy state, you can instantly heal an injured survivor, but in return, you give them your health state and receive the Weakness status for 60 seconds. A very powerful effect that allows you to save time healing your teammate, but you sacrifice your own health and additionally gain the Weakness effect for a long duration, leaving you helpless while it lasts.
SCOURHE HOOK: PAIN RESONANCE
At the start of the trial, you get Scourge Hooks and 4 tokens. Each time you hook a Survivor on one of these hooks, you spend a token. When a token is consumed, the most regressing generator instantly loses 20% progress.
This perk is insanely strong — it basically auto-chunks a gen for free and massively slows down gen rushing.
Sometimes the hook spawns are super awkward, or you’ve already used a token and can’t chase someone else right away. But sooner or later you’ll burn through all your tokens, and each one can completely shift the momentum of the match.
DEAD MAN`S SWITCH
Activates whenever you hook a survivor. At that moment, if any survivor stops repairing a generator, the Entity blocks that generator for 35 seconds.
This makes the perk extremely useful — you can shut down a crucial generator, preventing survivors from working on it for a while and giving yourself time to focus on other objectives.
However, there’s a downside: while the generator is blocked, you can’t kick it, which means perks that trigger from damaging generators won’t activate. In some cases, this can make Emergency Button a bit inconvenient.
The perk works best in combination with Pain Resonance — together, they regress generator progress and block it simultaneously, catching survivors completely off guard.
BARBECUE & CHILLI
When you hook a Survivor, you are able to see the auras of all Survivors who are more than 40 meters away from you. Aura reading is always cool and useful, especially since you gain information for every hook, making this perk quite strong. It allows you to see what Survivors are doing far from you — which generators are being repaired, who’s healing, or who’s moving around. This perk is especially good for mobile Killers who can quickly move across the map and close in on Survivors fast. However, you can’t see their auras if they are too close to you, which slightly limits its activation. Overall, this perk is solid and gives you great map awareness.
LETHAL PURSUER
At the start of the trial, you can see the auras of all Survivors for 9 seconds. In addition, this perk extends the duration of all your aura-reading effects by 2 seconds. A nice source of early information that helps you locate Survivors faster and start a chase immediately. Moreover, the perk also boosts other aura-reading effects, which can be extremely helpful for tracking during chases. Keep in mind that it also affects Killer powers and the perk’s own initial effect — meaning you can actually see Survivors for 11 seconds instead of the listed 9.
JOLT
When you put a Survivor into the dying state using a basic attack, all generators within 32 meters instantly explode and lose 8% of their progress, continuing to regress afterward. If a Survivor was working on one of those generators, they scream but do not reveal their location. This perk is great for Killers who rely mainly on basic attacks rather than their power — such as The Singularity, The Ghoul, The Wraith, and others. It’s especially useful on small or indoor maps where you can affect multiple generators in a large area, buying you valuable time. You can also tell if a Survivor was repairing a generator when it explodes and they scream — a good cue to check that gen for activity.
NOWHERE TO HIDE
When you kick a generator, you can see the auras of all Survivors within a 24-meter radius for 5 seconds.
A very useful and straightforward effect that provides a wide zone of information around you, letting you know the positions of nearby Survivors who may have recently worked on that gen.
Keep in mind that the perk centers around you, meaning you can move across the map and still reveal Survivors’ auras as you go — which makes this perk even stronger.
This perk is especially effective for mobile Killers, who can traverse the map quickly while constantly exposing Survivor auras in their path.
POP GOES THE WEASEL
For 45 seconds after hooking a survivor, your next gen kick becomes empowered, causing a much stronger explosion and removing an additional 15% progress.
This is a very solid advantage that can be useful at any time to apply strong gen pressure. Even though the effect is one-time and not huge, you can trigger it after every hook, which makes it a consistently strong perk — especially against genrush, and even better when combined with other slowdown perks.
BRUTAL STRENGTH
You can break pallets, walls, and gens 20% faster. Simple but solid buff—it makes smashing stuff a bit smoother and buys you some extra time. Especially useful in chases.
BAMBOOZLE
You vault windows 15% faster. On top of that, you can block that window for 16 sec (basically only one at a time). Nice add-on for forcing Survivors to switch loops and messing with their pathing.
This perk is also handy for speedy vaults, letting you catch up to Survivors faster. Super useful if you fake a chase and the Survivor jukes towards a window you vault, giving you a clean hit opportunity.
CORRUPT INTERVENTION
At the start of the trial, the three furthest gens get blocked for 120 seconds.
If any survivor gets downed to the dying state, the perk deactivates.
Pretty solid perk that stops survivors from insta-rushing gens, forcing them to move around and slowing down the early game.
It’s especially good for slow, walking killers who can’t get an early down fast — the perk keeps gens locked for most of the early phase, giving you great map pressure and tempo control.
PHANTOM FEAR
When a survivor looks at you while they’re inside your terror radius, they’ll scream and reveal their location for a short time. After that, the perk goes on a 60-second cooldown.
This perk helps you track survivors faster, kinda like Lethal Pursuer, giving you free info on where they’re hiding. It’s great for countering stealth survivors, especially in endgame or early chases when they try to sneak around.
Since it makes survivors scream, it can synergize really well with Eruption or Repressed Alliance, automatically blocking a gen when they trigger the scream.
It’s also really solid for mobile killers who can close distance fast, since you instantly get a location ping when the survivor looks at you.
Honestly, this could’ve been one of the strongest aura-reading perks, if not for that long cooldown. Plus, if it recharges right away, there’s a chance a survivor might accidentally trigger it while you’re carrying another survivor, wasting the proc and forcing another full cooldown.
COUP DE GRÂCE
When a generator gets completed, you gain 2 tokens.
Each token can be consumed to extend your lunge distance by 80%.
A solid perk that gives you a longer lunge — always useful in chases and for landing tricky hits.
Keep in mind that a token only gets used on slightly charged lunges, not every basic attack,
so you can save your tokens for more important swings when you really need that extra reach.
HEX: RUIN
You can place your own Hex Totem on the map. While active, all idle generators automatically regress at 150% repair speed. The Hex is disabled if the Totem is cleansed.
Solid Hex perk that regresses gens for you without wasting time hitting them. The bonus might seem small since the regress speed is only 0.25× repair speed, but it works on any gen and buys you extra time.
Remember—it’s a Hex, so any Survivor can break it if they find it. Best to guard your Hex to keep it alive. For stronger protection, you can pair it with Hex: Undying in your Hex builds.
THRILLING TREMORS
When you pick up a Survivor, all idle generators at that moment are blocked for 16 seconds, while gens currently being worked on are unaffected. The perk has a 30-second cooldown.
This perk is mainly for generator tracking, letting you see which gens are actively being repaired. Solid info perk, especially if you’re running anti-gen rush builds, helping you know exactly where to apply pressure next.
NO HOLDS BARRED
When a generator finishes being repaired, the most regressing generator after it gets blocked for 25 seconds. Gen blocking is always a solid way to slow down survivors’ progress.
Since it blocks the hottest regressing gen, it also gives you a hint of which gen is currently the most critical, making it super useful with regression-based perks. Pairs really well with Imp of the Tobacco Box, letting you track which gen is regressing the most.
AGITATION
When you’re carrying a Survivor, you gain 18% Haste and your Terror Radius increases by 12 meters.
It’s a nice, comfy perk that lets you hook Survivors way faster, giving you a bit more tempo. The extra speed also helps you reach a more convenient hook or even go for a hit on an altruistic Survivor trying to bodyblock.
The Terror Radius boost is decent too — you can throw Survivors off by making them think you’re closer than you actually are, or abuse the temporary TR spike to get extra value out of Terror-Radius-based perks.
GRIM EMBRACE
When you hook different Survivors, you gain a token.
Each token activates when you move 16 meters or more away from the hook, blocking all generators on the map for 10 seconds.
Once you hook the last unique Survivor, all gens get blocked for 40 seconds, and you also see the Obsession’s aura.
It’s a solid perk that lets you shut down gens whenever you want, interrupting repairs pretty effectively. And if you manage to hook the final Survivor, you can lock the entire map for a long time, giving you a ton of extra time — plus aura reading on the Obsession (though the aura isn’t always valuable if the Obsession dies early or is still on hook).
The perk works especially well on high-mobility killers or Knight, since they can quickly move across the map, trigger the blocks, and keep all the gens under control.
ERUPTION
When you kick a gen, you tag it for detonation (it gets highlighted yellow).
You can kick multiple gens — all of them will stay primed.
When any Survivor gets downed, all yellow gens explode, losing 10% progress.
If a Survivor was working on any of them, they scream and their aura is revealed for 12 seconds.
The perk has a 30-second cooldown.
Overall, it’s a pretty solid perk that slowly chips away at gen progress on its own and gives you bonus info. The best part is that it triggers off any down, even if you down them with your power or a special attack. Mobile killers especially can get great value by kicking gens on the go and detonating them consistently thanks to their fast map pressure.
DISCORDANCE
When two or more Survivors work on a gen, it gets yellow aura for you and gives you a loud-noise style alert.
The effect lingers for 4 seconds after they stop repairing.
Pretty decent info overall — Survivors love to stack on gens, so this perk can reliably tell you where they’re grouped up and what’s going on with that gen. Great for reading the game state and planning your next push.
SLOPPY BUTCHER
Now your basic attacks apply the Mangled and Hemorrhage status effects to survivors for 90 seconds when you hit them.
A nice perk that helps slow down healing and keep survivors injured for longer — especially useful when applying map pressure.
However, it only works with basic attacks, not special ones. Still, the effect is strong enough — plus, you can interrupt survivor heals, causing them to lose all progress when you get close.
SALT THE WOUND
When you kick a gen, it becomes Salt the Wound–marked for 60 seconds.
The perk boosts that gen’s regression speed to 150%, and if a Survivor hits a Skill Check on it, you get a notification.
It’s a nice perk for both gen regression and info, since it makes the gen tick back a bit faster and pings you when Survivors try to work on it.
But the extra regression is pretty tiny — during its whole 60-second uptime you only get around 8% extra rollback, which is really low.
Still, because you can activate it any time by kicking, it works well in 3-gens, slowing repairs and letting you instantly know when Survivors jump on that gen, which can be very useful for holding the area.
ENDURING
Now you recover from pallet stuns 50% faster.
It’s a pretty interesting perk that lets you shake off pallet stuns way quicker, helping you get back into action faster and avoid getting insta-blinded right after.
And if a Survivor accidentally stuns you on their own side of the pallet, you can often catch them with a hit thanks to the fast recovery while they try to vault away — which is pretty funny when it happens.
HEX: BLOOD FAVOUR
You can have your own Hex Totem on the map. While the Hex is up, every time you hit a Survivor, all pallets within 32 meters of them get blocked for 15 seconds. The Hex deactivates once it’s cleansed.
It sounds like a strong perk — and even though the effect only lasts 15 seconds, it can help you down Survivors much faster if there are no windows nearby. That’s a huge plus for pretty much any Killer.
But remember: it’s still a Hex, meaning Survivors can cleanse it whenever they find it. So you might want to keep an eye on it if you plan to use it late-game.
ALIEN INSTINCT
When you hook a Survivor, the farthest injured Survivor reveals their aura and gets Oblivious for 60 seconds. This part works kind of like a mini version of Barbecue & Chili, but only shows one Survivor. Not a bad bonus, but not exactly game-changing either.
This perk works best on mobile Killers or Killers who can land hits very consistently — like Legion or Plague. The added Oblivious effect also makes life harder for the already injured Survivor since it muffles your terror radius.
JAGGED COMPASS
You’ve got Scourge Hooks. Each time you hook a Survivor on one, you get to see the most progressed generator’s aura for 10 seconds. When a Survivor gets unhooked from any hook, that hook becomes a Scourge Hook.
It’s a decent perk that gives you info on the gen that’s slipping away so you can go kick it. The effect itself isn’t super strong for a Scourge perk, but the amount of Scourge Hooks increases over time, letting you use the perk more often. Works best on mobile Killers who can actually reach gens fast enough to defend them.
HEX: FORTUNE`S FOOL
When you hook a Survivor, they get cursed and receive the Oblivious status. Their personal Hex Totem becomes visible within a 16-meter aura. Each Survivor has their own Hex Totem they’ll need to cleanse.
It’s a pretty unique effect that lets you mess with Survivors’ sense of where you are, especially on indoor maps. Even though Oblivious lasts forever, Survivors will try to cleanse their Hex to get rid of it. But since they’ll be cleansing it without knowing you’re nearby, it can easily backfire for them.
TINKERER
When a generator’s progress goes above 70%, you gain Undetectable for 16 seconds.
This perk basically pings you whenever a gen is getting way too hot, which is always valuable info. On top of that, you get Undetectable so you can sneak up on Survivors and try to catch them off-guard (if you actually make it in time, of course).
Just keep in mind: the gen might have two or more Survivors stacking on it, and sometimes you simply won’t reach it fast enough to save it.
UNFORESEEN
When you kick a generator, you gain temporary Undetectable for 30 seconds. During this time, the gen you kicked turns your 32m Terror Radius into the generator itself.
Undetectable is always clutch for sneaky plays, and it only triggers when you interact with a gen for a kick. On top of that, your Terror Radius gets shoved into the gen, throwing Survivors off your location.
This perk is especially strong on tight or small maps where sneaky approaches really matter.
ULTIMATE WEAPON
When you open a locker, you can make all Survivors within 40m scream, revealing their location. On top of that, they get Blindness for 30 seconds.
Cooldown is 45 seconds. Pretty solid info perk — lets you force Survivors to scream from crazy far away without wasting time hunting them down.
Blindness isn’t super annoying by itself, but it can counter perks like UNIQUE OPPORTUNITY, making life harder for the Survivors. Cooldown is kinda meh for the potential of this perk, but still a nice little info tool.
DARKNESS REVEALED
When you open a locker, you can see the aura of all survivors within 8 meters of that locker for 8 seconds. Cool-down is 30 seconds.
Basically, this perk works kinda like All-Seeing Weapon. Overall, it’s a solid effect, letting you instantly check auras when you want, and in many cases it can reveal multiple survivors, giving you hefty info.
Keep in mind, though, that it only works around lockers in a small radius, and some maps have lockers spaced far apart. But in most matches, this perk can provide a decent amount of info and even spot stealthy survivors. Especially good for mobile killers.
FURTIVE CHASE
When your Obsession is hooked, you gain a 10% Haste effect and become Undetectable for 18 seconds. When another Survivor rescues them, the Obsession status is transferred to the rescuer.
This is a genuinely strong advantage that can make you very deadly for a short period of time and help you quickly find a new target. Even though the effect won’t trigger very often, it can still be a solid alternative perk. It is especially useful for highly mobile Killers.
SECRET PROJECT
Every time a totem gets cleansed or blessed, all generators get blocked for 30 seconds. When a gen is blocked, you gain Undetectable for 30 seconds.
Pretty weird but interesting perk — shines a lot in hex-heavy builds, letting you stall gens and go stealth at the same time. Since it procs off any gen block, you can also combo it with stuff like Eruption / Deadlock-style effects to sneak around.
In a normal match survivors don’t cleanse totems that often, so it’s kinda niche, but in specialized builds this perk can actually go hard and create nasty pressure plays.
OPPRESSION
On your next generator kick, all 4 generators currently being repaired trigger a hard skill check that survivors must hit, or the generator explodes. Survivors don’t usually expect this, making the skill check a sneaky way to punish them for trying to repair quietly.
Most of the time, survivors fail the skill check, and you get solid intel on which generators are being worked on—super useful. Despite the 35-second cooldown, this perk can catch survivors off-guard and disrupt their gen progress.
TURN BACK THE CLOCK
When you hook a survivor, you get the ability to shoot a nearby gen, instantly blowing it up and knocking off 10% progress, plus it keeps regressing for 60 seconds. Pretty spicy perk — lets you skip kicking gens and just pop them remotely, saving time and keeping pressure. Feels like a mini pop goes the weasel, but way more convenient. Honestly, it does its job and fits well into gen-pressure playstyles
SCOURGE HOOK: WEEPING WOUNDS
You got Sacrificial Hooks. When a Survivor gets unhooked from one, they get Injury + Bleeding for 90 seconds. After they heal, they also get a penalty to Repair/Healing speed until they get injured again.
Slowing down Survivors’ actions is always hefty for stalling the game, especially the higher the % penalty, the more it hits.
This perk forces Survivors to choose: either heal now and take a longer heal with the future penalty, or stay injured and eventually get tagged by the Killer.
HEX: THRILL OF THE HUNT
Your Hex activates.
For every Dull or Hex Totem remaining on the map, you gain 1 Token (up to 5).
For each Token, Survivors cleanse Totems 12% slower.
When a Totem is cleansed, this Hex loses 1 Token.
If this Hex Totem is cleansed, the penalty to cleansing speed is completely removed.
This perk provides a strong and healthy slowdown, making Totem cleansing and blessings take noticeably longer, which indirectly delays perks that rely on cleansing or blessing actions. It works especially well as protection for your other Hex perks, giving them more time to stay active.
It can be combined with any Hex perk, but it synergizes best with Hex: Undying, offering even greater protection. You can also use it alongside add-ons or perks that reveal Survivor screams, forcing them to abandon cleansing and waste time restarting the process.
Although the slowdown disappears if this Hex is destroyed, it can still apply huge map-wide pressure and make Survivors think twice before touching your Totems.
HEX: NO ONE ESCAPES DEATH
When a gate is powered, you get Haste 4%. You also gain the ability to down survivors with your basic attacks. After downing a survivor, the others gain Vulnerability. The Hex will form its aura, which gradually grows up to 24m.
Solid endgame addon that can flip a match if you’ve already downed and hooked a survivor near the gate. If survivors try to rescue without knowing about your Hex, you can wipe them all thanks to your boosted speed. It doesn’t happen often, but the impact of this Hex is serious.
NO WAY OUT
For each different survivor you hook, you gain one token.
When the exit gates are powered, any survivor who tries to interact with a gate will block it for 12 seconds, and each token adds another 12 seconds to that block.
If your endgame goes badly, this perk gives you a second chance to turn things around and secure at least a –1 in the last minute of the match. The gate block is super clutch when a survivor is still on the hook — they can’t 99% the gates while it’s blocked, which buys you a ton of time.
You also get an audio cue, which is especially useful in a 1v1 endgame: if you’ve already closed the hatch and they touch the gate, the sound gives away their exact location and leaves them with zero escape options.
HEX: CROWD CONTROL
You get your own Hex Totem on the map. While the Hex is up, every window a survivor vaults through gets auto-blocked. You can block up to 5 windows total.
Window blocking is a really strong anti-loop tool — especially in chase. It forces survivors to ditch any window-heavy tiles and rely mostly on pallets or whatever scraps they’ve got left. It also stops survivors from abusing a single god-window loop forever, which every killer knows is insanely annoying.
Just remember: it’s a Hex, so survivors can break it. It’s a good idea to defend your Hex sometimes if you want to keep using it throughout the match.
RAPID BRUTALITY
Each time you hit a survivor with a basic attack, you gain a 5% Haste effect for 10 seconds.
Extra speed is always nice — it opens up more chase potential and helps you keep pressure on survivors. But the trade-off here is big: this perk removes Bloodlust entirely.
Bloodlust can be clutch, especially for M1 killers who struggle to catch survivors on open or long loops, since it normally helps them close the distance. Without it, your long chases can get tougher.
Still, the perk’s burst of Haste can sometimes let you immediately catch a survivor in a dead zone or finish a chase faster than expected. It tends to work best on mobile killers who rely on basic attacks, like Singularity or Ghoul, letting them snowball momentum between hits.
I`M ALL EARS
Whenever a Survivor fast-vaults over an obstacle, their aura is revealed for 8 seconds. Cooldown: 30 seconds.
This perk gives you valuable information about where the Survivor is going after a vault, allowing you to play more unpredictably and aggressively, which is very useful. However, it’s important to keep in mind that the perk has a 30-second cooldown, meaning you won’t be able to benefit from this information too often during a chase. For best use, it works well with stealth Killers or highly mobile Killers, as they can take better advantage of the revealed aura.
UNBOUND
When a survivor is injured, this perk activates — giving you a 7% Haste effect for 10 seconds after vaulting a window.
The speed boost is quite noticeable and can help you catch survivors faster in loops or tight chases, allowing for quick downs. However, it requires that a survivor be injured first, which can make activation situational. While landing that first hit may seem easy, in practice it’s not always reliable.
This perk generally triggers only once per chase, making it somewhat inconsistent. Additionally, it doesn’t synergize well with certain killer powers, forcing you to choose between using your ability or taking a regular vault to gain the speed bonus.
DRAGON`S GRIP
When you kick a gen, the perk activates for 30 seconds. If a survivor tries to touch that gen during this time, they get Exposed for 60 seconds. After it triggers, the perk goes on a 30-second cooldown.
This gives you a great way to punish survivors who rush back to a freshly kicked gen — you get a free info ping and a chance to insta-down them, which is pretty strong.
But keep in mind: the effect is temporary, and most survivors will either hide or run to the other side of the map, making it harder to actually capitalize on the Exposed.
Also, if you're playing around a 3-gen, the Exposed might not help much — the pressure is already high, and you can’t always break off to chase someone.
This perk works best when paired with other gen-control perks, letting you mess with survivors and catch them off-guard when they least expect it.
OVERCHARGE
Whenever you kick a gen, its regression rate ramps up — starting at 85% efficiency and climbing to 130% over the next 30 seconds.
If a survivor jumps on that regressing gen, they’ll get a difficult Skill Check. Failing it causes an explosion and slaps them with an extra -4% penalty to the gen’s progress.
It’s an interesting regression perk that gives you steady value over time, letting you drain more progress the longer it’s left alone. A failed Skill Check punishes hard with a 9% total loss, plus the explosion animation stops survivors from repairing for a moment — stacking even more slowdown.
This perk shines in 3-gen builds or slowdown setups, where survivors will inevitably trigger explosions and feed you extra time. Just keep in mind — right after kicking, your regression is slightly reduced for a few seconds, giving survivors a small window to make up progress.
FIRE UP
After each completed generator, your action speed increases by 6%, stacking up to 30%.
This perk scales with the match, growing stronger as more gens get done — giving you noticeable boosts to all your key killer actions. Despite the intimidating late-game power, it’s pretty weak early on, since it only ramps up once survivors start finishing gens.
Still, keep in mind it speeds up vaulting, breaking, and picking up survivors, all of which are crucial killer actions. With a few stacks built, you can lift survivors so fast it’s nearly impossible to flashlight save you.
Overall, it’s a late-game powerhouse, rewarding patient killers with massive efficiency buffs once the trial gets bloody.
SAVE THE BEST FOR LAST
Each time you hit a survivor with a basic attack, your attack recovery time is reduced by 4%, stacking up to 32%.
When you hit your Obsession by any means, you lose 2 tokens.
This perk lets you gradually speed up your recovery after swings, making your attacks feel snappier and more fluid. It’s a comfortable and fun perk, especially for M1-based killers, who can reliably build stacks through repeated hits. The faster recovery helps you regain movement speed quicker and chain actions faster after attacks.
However, there’s a downside — hitting your Obsession drains your stacks, which can wipe out your progress if you’re not careful. Two hits, and your buff can be gone, forcing you to rebuild it all over again. It’s best to avoid your Obsession when possible, letting the perk stay active longer.
Save the Best for Last works great with Brutal Strength or other chase-based builds, and even though it removes Bloodlust, it still helps you shut down loops faster, giving survivors less time to reach safety.
BATTERIES INCLUDED
When you’re within 16 meters of a completed generator, you gain a 5% Haste effect. The Haste lingers for 5 more seconds after you leave the area.
It sounds pretty interesting and universally useful — Haste is always valuable for both killers and survivors. But the perk has its downsides: it only works within a limited radius around a finished gen, and you need that gen to already be powered for the effect to activate. That makes the perk harder to use consistently.
Still, if survivors rush gens really fast, this perk can make you a bit more mobile in certain areas of the map. And if a completed gen happens to be near strong tiles, you can take advantage of the bonus speed to catch survivors more easily. It’s especially helpful on maps with generators located on lower floors, since you can gain the Haste above ground as well.
Overall, this perk can fit well into gen-control setups or speed-focused builds.
PREDATOR
When you break chase with a survivor, you see their aura for 4 seconds. The perk has a 40-second cooldown.
This effect can be handy when you often lose survivors in awkward tiles or tight structures. But in most situations you won’t be dropping chase that much, so the perk won’t always get real value — usually you’ll just catch them anyway.
This perk shines the most on special killers, especially Wraith, who can instantly go into stealth right after chase ends and immediately see the survivor’s aura. That can be surprisingly useful in the right moment.
HEX: DEVOUR HOPE
When a Survivor is unhooked while you’re far enough away, you gain 1 token.
With 1–2 tokens, you get a 5% Haste effect for 10 seconds whenever you walk away from the hook.
At 3 tokens, all Survivors become Exposed.
At 5 tokens, you can Mori a Survivor by your own hand, no conditions attached.
This perk gives you some pretty strong effects — especially the Exposed and the free Mori. In the right moment, you can completely catch Survivors off guard and make them feel totally helpless.
But the main issue is that it’s a Hex perk, which makes getting full value pretty unreliable. Survivors can cleanse your Hex early in the match, stopping you from ever reaching 5 tokens.
Most of the time this perk is paired with other Hexes like Hex: Plaything, Hex: Undying, etc. With those builds, Survivors will have a really rough time clearing all the totems, and late-game you can easily take a couple Survivors out once the Hex activates.
COULROPHOBIA
When Survivors attempt to heal within your Terror Radius, their Healing speed is reduced by 50%, and Skill Check trigger frequency is increased by 50%.
This perk can heavily slow down Survivors’ healing attempts, giving you extra information through failed Skill Checks. However, the effect only applies within your Terror Radius, limiting its use to close encounters.
On small or indoor maps, this perk can completely deny healing and keep Survivors injured for most of the match. Works well in builds focused on Terror Radius pressure or anti-healing strategies.
REMEMBER ME
Whenever your Obsession loses a health state, you gain a token (up to 5).
Each token adds +6 seconds to the exit gate opening time.
Doesn’t affect your Obsession directly.
This perk can seriously stall endgame gates, making escape way harder for survivors.
While the effect is pretty sweet, it’s got some downsides — you’re not always gonna rush to the gates right away since survivors might be ratting in bushes, or you’re still in a chase with a juicy injured one.
Unlike No Way Out, this perk doesn’t block the gates, but it can still drag out the opening up to 60 seconds, which is a ton of time in killer hands.
The downside is your Obsession ignores the slowdown, so it’s a bit of a gamble.
Still, it works great for endgame builds, especially if you wanna tilt survivors and make them panic when the gates crawl open like molasses.
HEX: HIVE MIND
When you hit a survivor, this Hex lights up. While it’s active, whenever a gen is being worked on, you can see the progress of ALL generators by color, which gives you insane info across the map.
When the last generator is about to be finished, all remaining gens auto-explode, losing 10% progress, and after that the hex gets cleansed automatically.
Overall, this perk gives you huge gen intel during the match and a nice endgame slowdown, which can feel really clutch. The downside is obvious — it’s a Hex, so survivors can cleanse it early and you lose all that info, even though it doesn’t activate instantly.
If you don’t like guessing gen progress and want more map awareness, this perk can be solid — just play around it carefully and don’t overcommit.
SUPERIOR ANATOMY
Whenever a survivor vaults a window right in front of you, you can vault that same window 40% faster.
Has a 25-second cooldown.
This perk lets you zoom through windows like a maniac, perfect for catching those cocky survivors who think a single vault will save them.
Just remember — it only kicks in after a survivor vaults, so timing matters.
The cooldown’s kinda rough, meaning you’ll only get to use it a few times per chase, but it’s still hella fun for speedy or chase-based builds.
Throw it on if you wanna mess around with fast vault plays or surprise people mid-loop.
OVERWHELMING PRESENCE
When a Survivor uses their item within 32 meters of you, they get Exhausted for 15 seconds.
When a Survivor becomes Exhausted this way, you see their aura for 4 seconds.
The perk has a 25-second cooldown.
This perk is pretty interesting but kinda tricky to get real value from. To activate it, the Survivor actually needs to have and use an item — like a flashlight — usually during chase. When it procs, you slap them with Exhaustion, shutting down any Exhaustion perks they wanted to use, even things like Dead Hard.
Plus, the brief aura read gives you some extra info right after they burn their item or Exhaustion perk.
The downside is the 25-second cooldown, so it doesn’t give you nonstop pressure. Still, in the right matchup, it can mess with Survivors who rely on items or Exhaustion perks.
FRIENDS TIL THE END
Whenever you hook your Obsession, a random survivor becomes the new Obsession.
When you hook a regular survivor, the current Obsession’s aura is revealed for 10 seconds, and they get Exposed for 20 seconds.
This perk lets you swap your Obsession on the fly, which can pair really well with other Obsession-based builds.
It also gives you a bit of info on who your new target is — perfect for triggering Emergency Button or other combo perks.
The downside? That Exposed window is super short — just 20 seconds — so landing an instant down is pretty rare, even for the more mobile killers.
Still, the ability to manipulate Obsessions and get free aura reads makes this perk surprisingly flexible.
Run it if you’re looking to experiment with creative killer setups or just wanna mess around with Obsession mechanics.
MERCILESS STORM
Whenever a survivor pushes a gen past 90% progress, they start getting hard skill checks until it’s done.
If they miss even one, the gen gets blocked for 20 seconds.
This perk can catch survivors off guard and deny a gen pop right before it finishes — perfect for keeping it locked down and ready for patrol.
But keep in mind, experienced survivors can usually nail those skill checks, meaning the block won’t trigger often.
You can also pressure the area — if the survivor lets go of the gen, it’ll instantly block, forcing them to wait it out.
A neat anti-gen-rush tool, especially for killers who like to control endgame pressure or camp key gens late match.
HEX: WRETCHED FATE
When a generator is completed, a Hex activates.
Whenever your Obsession starts repairing a generator, their repair speed is reduced by 33%.
Survivors can see the aura of this Hex Totem within a 12-meter radius.
This perk helps slow down gen rush and buys you some extra time. If your Obsession decides to work on gens with a teammate, they’ll both suffer a massive repair penalty.
However, the Hex can be cleansed pretty early, and since survivors can see it glowing, it’s not that hard for them to find and break it.
BEAST OF PREY
Whenever you’ve got Bloodlust running, you gain Undetectable for 40 seconds.
Not the strongest perk for straight-up chases, but it can catch survivors off guard, especially when your red stain disappears, making it harder for them to read your movement around loops.
In some cases, you can even drop chase and sneak up on another survivor completely unnoticed.
A fun stealth twist for killers who like to mix pressure and mindgames, turning your chase momentum into a sudden vanish play.
RAVENOUS
When you hook each Survivor, you gain a token.
Once you hit 4 tokens, all Survivors get Exposed for 60 seconds and scream, giving away their location.
It’s a pretty strong effect that can let you instantly down anyone on the map. But you need to hook every Survivor once to activate it, which takes some time. On top of that, the perk is one-time use, so after it pops, that’s it.
Even though the scream info is nice, you won’t always be lucky enough to reach a Survivor and hit them before the Exposed timer runs out, which makes the perk somewhat unreliable.
NURSE'S CALLING
When Survivors heal within 32 meters of you, you see their auras.
You can’t see auras if they’re healing someone who’s in the dying state.
Survivors usually don’t expect this perk and can easily get caught mid-heal, letting you finish off an injured Survivor for free. But a lot of the time, Survivors heal in safer spots, and if they hear your terror radius, they’ll just stop healing.
Still, this perk can catch people completely off-guard and let you snowball hard. Works well in anti-healing builds.
DISSOLUTION
When a Survivor gets hit, the perk kicks in for 20 seconds. If a Survivor vaults a pallet during this time, it instantly breaks. Super strong effect that basically denies Survivors any pallet play, putting them in a dead-zone and deleting the pallet right away.
But the perk only lasts 20 seconds, and in most cases the Survivor won’t even drop a pallet in time for it to pop.
The perk only works inside your Terror Radius — if you’re Undetectable, it won’t trigger, which makes it a bit inconsistent.
Still, in some situations it can be really clutch. For example, if a Survivor runs into a super safe structure and you force them to vault, or if another Survivor tries to stun you with a pallet while you're picking someone up — there’s a chance they’ll vault it instead, and the pallet just pops instantly.
FRANKLIN'S DEMISE
When you hit a Survivor, they drop their item. You can see the auras of dropped items within 64 meters. The perk basically cuts Survivors’ resources whenever they run into you, limiting their options. Super useful against flashlights, since those can be really annoying during chases or when you're trying to pick someone up.
Even with this effect, Survivors can still pick their item back up and keep using it.
Back in the day, the perk also drained item charges over time, which really shut down Survivor resources after each hit. Sadly, they removed that part, and the perk isn’t as attractive as it used to be.
DARK ARROGANCE
You vault windows 25% faster, but in return you suffer a 15% penalty to pallet stuns and flashlight blinds.
Despite the noticeable vault speed boost, the drawback makes you more vulnerable to Survivor counterplay, which isn’t always a great trade-off. Still, the perk can be useful in chases, though there are other vault-speed perks that give similar benefits without any downsides.
It can fit into builds focused on speeding up actions.
PLAY WITH YOUR FOOD
Each time you end a chase with your Obsession, gain 1 token (up to 3).
After gaining a token, the perk enters a 10-second cooldown.
Each token grants you 5% Haste, which lasts until you perform a basic or special attack.
It’s a pretty interesting effect, but kinda tricky to use effectively.
To keep the perk going, you basically need to find your Obsession and keep dropping chase over and over to stack the speed bonus.
While the Haste can be pretty strong in some situations, you lose all stacks the moment you even swing or miss an attack, making it a bit unreliable.
Still, it can shine on killers like The Plague, since her Vile Purge doesn’t count as an attack — letting her infect Survivors without losing the speed boost.
HEX: UNDYING
You see the auras of Survivors within 4 meters of your Totems.
When a Survivor cleanses your Hex Totem, Hex: Undying activates to protect it, sacrificing itself to preserve your remaining Hex perks.
This is a specialized perk commonly used in Hex-focused builds for reliable value. It helps you keep your key Hex perks active longer and also reveals Survivor auras near your Totems, making it easier to defend them.
On its own, the perk isn’t particularly powerful, but in the right builds it becomes extremely useful and provides strong synergy with other Hex perks.
MACHINE LEARNING
Whenever you manually damage a generator, it becomes Defective.
When a Survivor finishes repairing a Defective generator, you gain Haste (+8%) and Undetectable for 60 seconds.
The bonuses are insanely strong, letting you pull off some crazy pressure plays.
However, to get those buffs, a Survivor actually needs to finish a Defective gen, which sounds simple on paper — but not so much in practice.
As the match goes on, you’ll end up kicking other gens to keep regression going, which removes the Defective status from earlier ones.
Most of the time, Survivors just end up completing different gens entirely, meaning this perk might only trigger a couple times per match — or not at all.
Still, if you manage to pull it off, the effect gives you a massive tempo swing that can completely turn a chase around.
MONITOR AND ABUSE
While in a chase, your Terror Radius increases by 15%. When not in a chase, your Terror Radius is reduced by 25%.
This perk lets you stay much stealthier for most of the match and can confuse Survivors about how close you actually are once a chase begins.
It works best on killers with a naturally small Terror Radius, making them even harder to detect before the chase starts.
HYSTERIA
When you hit a Survivor, all other Survivors gain Oblivious for 40 seconds.
The perk has a 20-second cooldown.
During normal chases, the effect provides only minor pressure, since Survivors often stay aware of your position. However, the perk becomes much more valuable around unhooks, where Survivors won’t realize you are approaching due to Oblivious.
This perk also performs well on Killers who can consistently land hits in rapid succession, allowing them to repeatedly disable Survivor awareness and create strong map pressure.
HEX: FACE THE DARKNESS
Whenever a survivor is injured, they scream every 25 seconds, revealing their location and showing their aura for 2 seconds if they’re outside your Terror Radius.
If the cursed survivor goes down, the Hex is cleansed.
This Hex gives you a steady stream of info on injured survivors — perfect for keeping tabs on the field, especially if you’re running Stealth or Undetectable builds.
Despite being a Hex, it’s got a unique twist — it burns itself out when a survivor hits the ground, keeping the perk cycling naturally throughout the match.
Overall, it’s a solid info Hex that lets you track wounded prey and stay one step ahead, punishing survivors for trying to play injured.
ALL SHAKING THUNDER
When you fall from a small height, the duration of your lunges is increased by 75% for 25 seconds.
The perk has a 5-second cooldown.
It’s generally inferior to Coup de Grâce, which gives you extended lunges without requiring any setup — and with an slighty stronger effect.
However, this perk can be useful for setting up ambushes, especially when a chase leads to elevated areas or drop spots.
Keep in mind that activating the perk produces a loud audio cue, meaning Survivors can hear when it’s triggered.
MIND BREAKER
While repairing a generator, Survivors suffer from the Exhausted and Blindness status effects.
These effects linger for 5 seconds after they stop repairing.
This perk completely removes their ability to read auras — whether it’s yours, dying Survivors’, or any aura-based info — making it a powerful effect in certain situations.
Additionally, since Survivors are Exhausted while repairing, they can’t recharge their exhaustion perks, giving you the perfect chance to land a hit without worrying about sprint bursts or other speed boosts.
However, this perk can be less effective against coordinated teams (SWF), since they can communicate everything over voice chat and still track the match manually.
GEAR HEAD
Whenever a Survivor loses a Health State, for the next 30 seconds you can see the auras of any Survivors who succeed a Skill Check within 8 seconds after it.
This perk isn’t always a must-have, since you’ll often be busy chasing the injured Survivor —
but it can help you keep track of gens being worked on, giving you a chance to protect them for the rest of the match.
STARS TRUCK
While carrying a Survivor on your shoulder, all other Survivors within your Terror Radius suffer from the Exposed status effect.
The effect lingers for 30 seconds after you either hook or drop the carried Survivor.
This perk then goes on a 60-second cooldown.
The effect can be quite terrifying and oppressive for Survivors, since anyone caught nearby can be instantly downed. However, its range and timing make it situational — you might not have enough time to find someone before the effect wears off.
This perk can be critically strong against altruistic Survivors who rush in to body-block or flashlight save, making their rescue attempts a risky gamble.
You can also drop the Survivor intentionally to trigger the perk’s effect.
In the past, this combo was notorious on The Nurse, who could Blink instantly to down Exposed Survivors, leaving them no chance to escape.
ZANSHIN TACTICS
You gain the ability to see the auras of pallets and windows.
Whenever a Survivor drops a pallet, their aura is revealed to you for 5 seconds.
This gives you a heads-up on where the Survivor’s resources are for later use.
However, this ability feels much weaker compared to Survivor-side perks — while you can easily tell where broken or still-standing pallets and windows are, the info doesn’t help much in chase.
Still, the secondary aura reveal on the Survivor can be clutch in indoor maps or tight areas, where predicting their path is harder.
THWACK!
At the start of the Trial, you begin with 3 tokens.
Each time you break a pallet or a breakable wall, Survivors within a 36-meter radius scream and their auras are revealed for 6 seconds.
You can gain additional tokens by hooking Survivors.
This perk provides powerful long-range information, especially when there are plenty of wooden structures nearby.
However, you’ll often spend your tokens breaking pallets during chase, where the aura reveal duration is too short to be truly effective.
THWACK! works rather situationally — once you’ve destroyed the nearby resources, the perk becomes inactive until you hook more Survivors to recharge your tokens.
Since the perk makes Survivors scream, it can synergize well with perks that block generators, healing, or even totems.
Still, for consistent information, you might prefer Nowhere to Hide, which is always active and provides reliable Survivor location tracking across a wide range.
SPIRIT FURY
For every pallet you break, you charge this perk.
After breaking a total of 2 pallets, the perk activates.
The next time you’re stunned by a pallet, it will be instantly destroyed, and the perk becomes deactivated again.
It can help you clear pallets a bit faster, especially if you’re rushing through chases or trying to keep map pressure.
However, don’t rely on it too much — once Survivors realize you’re running this perk, they’ll start dropping pallets early, forcing you to break them manually anyway.
This perk synergizes well with Enduring, as well as other anti-stun perks, making pallet plays much less punishing.
AWAKENED AWARENESS
While carrying a Survivor on your shoulder, other Survivors reveal their auras within a 20-meter radius.
Aura reading is always useful, but you can’t make full use of it while carrying someone.
It can help you spot Survivors hiding near the hook, or notice someone just running by.
Since the effect ends once you drop the Survivor, it’s difficult to fully capitalize on this perk.
HEX: PENTIMENTO
When a Survivor cleanses a Hex Totem, it glows white for you.
By interacting with it, you can restore the totem and simultaneously apply a penalty to Survivors’ healing and repair speeds of 20%.
Each subsequent restoration of the Hex Totem increases the penalty by 3%, up to a maximum of -32%.
When you restore the last totem, the Entity blocks all Hex Totems for Survivors.
Survivors can also destroy Hex Totems again to reduce the penalty.
Survivors within a 16-meter radius can see these totems.
This perk is very interesting, as it allows you to suppress Survivors’ efficiency throughout the match and prevent further destruction of Hex Totems.
The addon is especially useful in Hex-focused builds for controlling the pace of the game.
Even though the penalty is strong, Survivors can still find and destroy Hex Totems if they read auras.
In some situations, this perk can completely swing a match, though before the change, the totem glowed brighter.
CRUEL LIMITS
When a generator is completed, all windows get blocked for 30 seconds.
They glow yellow for you.
Not a terrible effect, but also not very reliable — it works very unpredictably, and a generator might pop at an inconvenient time.
The perk can be decent during chases, denying survivors window loops, but unfortunately it activates at random, making it inconsistent.
DEATHBOUND
When a survivor heals their teammate, both scream and reveal their location. If they step away from each other by 4 meters, they get the Oblivious effect until they take damage.
The healing survivor can see the aura of the teammate they’re healing. Makes heals riskier and more dangerous in certain situations — sometimes these survivors won’t even notice if you’re creeping up on them.
But the perk also gives aura reading to the healing survivor, letting them better track if you’re approaching their teammate.
LIGHTBORN
You gain full immunity to any blinding. When survivors try to blind you, their aura is revealed for 10 sec. This perk completely shuts down flashlights or other blinding tools, which really helps keep you undisturbed.
The perk is especially strong against altruistic survivors who now can’t blind you while hooking. Best used when there are 2–3 survivors carrying flashlights, so you can dedicate a slot to this perk.
SPIES FROM THE SHADOWS
When a survivor disturbs a crow within a 36-meter radius, you receive an audio cue indicating where the crow was startled.
This perk has a 5-second cooldown.
It’s not the strongest info perk — you can usually hear crows yourself with good headphones and track survivors the same way. However, the range is quite large, meaning it can ping survivors even outside your Terror Radius, giving you unexpected intel across the map.
This perk is best suited for newer killers who struggle with sound awareness or survivor tracking, helping them learn positioning and spot movement without relying purely on audio cues.
LEVERAGE
When a survivor is unhooked, their healing speed is reduced by 30% for 60 seconds.
It has a similar effect to Sloppy Butcher, but this perk only triggers after an unhook, rather than applying an instant debuff on hit.
It can be useful for slowing down survivor heals, giving you time to apply more pressure.
However, Sloppy Butcher is generally better — it applies immediately, adds Hemorrhage and Mangled, and its effects can persist even after the unhook.
BLOOD WARDEN
Once any exit gates are powered, Bloody Watcher activates.
When you hook a Survivor during the countdown, the Entity blocks the exit gates for 60 seconds.
You can also see the auras of Survivors if they are near the exits.
This perk is extremely situational, but can be truly devastating for exit-gating survivors.
If you manage to hook a survivor in less than half the countdown, you will literally kill every survivor on the map and they will have no choice..
Of course, this doesn’t happen every time, but it can be a terrifying effect for survivors who try to stall the match.
Obviously, it’s not something to rely on every game, and it’s best paired with late-game-focused builds.
FORCED PENANCE
Survivors who take a protection hit for their teammate suffer from the Broken status effect for 80 seconds.
It’s an annoying debuff, but not particularly strong. Most altruistic survivors don’t care about taking a hit and can still manage to break a hook or blind you afterward.
However, in certain situations, this perk can punish those body-blocking survivors hard, making it much harder for them to pull off a save.
INFECTIONS FRIGHT
When you down a Survivor, every Survivor inside your Terror Radius screams, revealing their location for 6 seconds.
Not really a must-have perk — most of the time, you’ll just pick up your downed target instead of chasing others. Still, it can come in clutch for spotting Survivors trying to flashlight save or break a hook.
Players usually run this one for quick slug plays, especially on killers like Bubba or Oni, who can down multiple Survivors fast with their power or add-ons.
HEX: HAUNTED GROUND
Two Cursed Totems appear on the map.
If a Survivor cleanses either totem, all Survivors become Vulnerable for 80 seconds.
Does not apply to other Hexes.
A really sneaky effect that can catch Survivors off-guard.
Some players might get suspicious of the totem since they won’t be told what the Hex does, but that ambiguity is the point — you can slot this into Hex builds to bait Survivors into breaking the totem and punish them by forcing a big Vulnerable window.
If timed well, you can even bait them into destroying one or both totems to trigger the effect and swing chases in your favor.
HUBRIS
If a survivor stuns you by any means, they get the Exposed effect for 30 sec. The perk has a 20 sec cooldown. Lets you straight-up rush pallets, knowing that if they stun you, you can punish them.
In some situations, you still might not get to use the perk because the survivor can gain distance while you’re downed. Best used with the combo of ENDURING + SPIRIT FURY to make your stuns a nightmare for survivors.
NEMESIS
Each time you are stunned, the Survivor who stunned you becomes the Obsession and is afflicted with Oblivious.
You can see their aura for 8 seconds.
Not the strongest perk in regular chases, but it can really shine in builds centered around the Obsession mechanic. Great for tracking down those cocky Survivors who think pallet stuns are free.
DARK DEVOTION
Each time your Obsession loses a health state, they gain a 40-meter Terror Radius aura for 45 seconds, while you become Undetectable for the same duration.
This lets you completely confuse Survivors, making them think you’re somewhere you’re not. Great for messing with their positioning and creating mindgames mid-chase.
However, Survivor teams on comms won’t be too affected — they can easily call out your real location.
Best used in Obsession-focused or stealth builds to throw off solo players.
Keep in mind, the fake Terror Radius doesn’t count for perks that depend on your actual Terror Radius.
MAKE YOUR CHOICE
When you hook a Survivor, if you are more than 32 meters away from the hook, the perk activates.
If the hooked Survivor is rescued while the perk is active, the rescuer screams and becomes Exposed for 60 seconds.
The perk then enters a 60-second cooldown.
This lets you instantly punish unhook saves, turning bold rescuers into easy downs.
However, even with such a strong effect, it’s not foolproof — stealthy Survivors can hide right after unhooking, or simply wait out the timer.
Best used when you know exactly what you’re doing — great for Exposed-based builds or killers like The Wraith and The Dredge, who can quickly capitalize on the scream with their mobility and stealth.
TERMINUS
When the Exit Gates are powered, all injured survivors gain the Broken status effect.
This effect lingers for 45 seconds after the gates are opened.
It can make healing much harder for survivors, keeping them injured and easier to track by grunts and blood trails. It also means if you injure someone before the gates are powered, they won’t be able to heal once they are — making rescues way riskier.
While the perk doesn’t trigger often, it can be very effective in endgame builds, locking survivors in a permanent injured state just when they need safety the most.
WEAVE ATTUNEMENT
When a survivor uses up their item, they drop it and can see its aura. Any survivor within a 12-meter radius of that item has their aura revealed to you.
If a survivor picks the item back up, they gain the Oblivious status effect for 30 seconds.
It’s a bit of an odd perk, but it can give you valuable info on survivor positions, especially if they’re carrying toolboxes near gens or other utility items. When multiple survivors drop their items in close proximity, it can create a sort of constant aura web, letting you track movement across key areas.
This perk pairs extremely well with Franklin’s Demise, since that perk forces survivors to drop their items, which then show their auras through this perk — giving you both pressure and intel in one nasty combo.
SURVEILLANCE
When you damage a generator, its aura turns white.
When a survivor starts repairing that gen, its aura becomes yellow and is revealed to you for 16 seconds.
Additionally, repair sounds from that generator are 8 meters louder.
It’s not the most essential perk, since you’ll usually already expect survivors to return to a kicked gen sooner or later — so the info can feel redundant. However, it can shine on stealthy or mobile killers, letting you sneak up on survivors who think they’re safe.
It also has a nice synergy with Pain Resonance, letting you instantly see which gen exploded and whether survivors are rushing back to it. Works especially well on The Knight, who can kick gens from range using his guards and then ambush survivors when they return.
RANKOR
When a generator is completed, all Survivors see your aura for 3 seconds — and you, in turn, see their locations.
When the Exit Gates become powered, the Obsession is inflicted with Exposed, and you may instantly kill them.
This perk is weird but brutal — it hands you repeated windows of info every time a gen finishes, and then hands you a one-shot finish on the Obsession once the gates are powered.
In the right build it can let you chain combos to one-shot Survivors and completely lock down endgame plays.
That said, it’s very situational: the Obsession might already be dead, or you might not be in a position to capitalise on the exposure — so don’t expect it to carry matches on its own. Use it in coordinated or surprise-y builds where you can guarantee follow-up damage.
WANDERING EYE
When you locate a Survivor, the perk activates.
You see the auras of all injured Survivors within a 20-meter radius for 5 seconds.
Cooldown: 30 seconds.
It can sometimes reveal weakened Survivors for an easy down, making it a decent tracking tool for finishing off targets or catching them off guard mid-heal.
Overall, it’s a solid info perk — but if your goal is to find healing Survivors, you’ll probably get better results from Nurse’s Calling, since it gives automatic info at a larger range.
LANGUIDTOUCH
When a Survivor startles a crow within a 36-meter radius, they become Exhausted for 10 seconds.
Cooldown: 5 seconds.
This perk works similarly to Spies from the Shadows, but instead of giving you a notification, it inflicts Exhaustion when a crow is startled.
In rare cases, it can prevent Survivors from using Sprint Burst, Lithe, or other mobility perks if they trigger a crow at the right moment. However, most of the time Survivors will have already used their exhaustion perk — or will trigger the crow right after it — making the effect useful mainly against perks like Dead Hard or Overcome.
Although the perk doesn’t provide direct information about the Survivor’s location, you can use its cooldown timing as a clue that it has activated nearby, giving you a rough idea of where the crow was disturbed.
GAME A FOOT
When you hit the Survivor who has spent the longest total time in chase, they become the Obsession.
While chasing the Obsession, breaking pallets or generators grants you a 7% Haste effect for 10 seconds.
This speed boost is fairly decent and can trigger multiple times — for every pallet or even generator you break during a chase. However, the perk is quite situational and doesn’t activate often enough to be consistently useful against all Survivors.
Even though you can change your Obsession to trigger the Haste effect again, it still tends to be unreliable, since you’ll lose a bit of time during the breaking animation — reducing the benefit of the speed bonus.
BLOOD HOUND
From now on, you can see Survivor blood pools much brighter than usual, and they remain visible for 4 seconds longer.
It’s a useful effect when chasing injured Survivors who’ve managed to break line of sight or move away from you. However, in most situations it’s unnecessary, since you can simply use visual filters or settings to increase the brightness of both blood and other objects — making Survivors easier to track.
This perk might be helpful for beginners who struggle to follow or locate hidden Survivors, but there are far stronger perks that provide more reliable tracking information.
GENETIC LIMITS
When a Survivor is injured, they gain the Exhausted status effect for 8 seconds.
At first glance, this sounds like a great counter to exhaustion perks — preventing Survivors from using their second-chance abilities to escape. However, in practice, the effect is mostly useless, since Survivors usually have enough time to activate their exhaustion perk before you land the hit.
While it can occasionally counter perks like Dead Hard or Smash Hit, most of the time Survivors can simply wait out the short duration of the effect while you’re busy dealing with pallets or repositioning during the chase.
DYING LIGHT
When the Obsession is alive, each time you hook a Survivor, you gain 1 token.
Each token reduces the repair, healing, and cleansing speeds of all Survivors (except the Obsession) by 3%.
In return, the Obsession gains a 33% bonus to healing and unhooking speeds.
This perk can gradually stack powerful slowdown effects depending on how many Survivors you’ve hooked. While it can significantly stall the game in the long run, it’s weak early on. The downside is that the Obsession doesn’t suffer from these penalties and instead receives a boost, which can sometimes work against you in certain situations.
Despite its trade-offs, the perk can change the flow of a match, though not always consistently.
STRIDOR
You can hear Survivors’ grunts of pain 50% louder and their breathing 25% louder.
This perk is mostly useless and unnecessary — you can already tell when a Survivor is nearby just by listening normally. While it might be somewhat helpful for beginners or players with low in-game volume, it doesn’t add much value overall.
Players using headphones can easily pinpoint the direction of grunts and breathing more accurately than this perk could ever provide.
THANATOPHOBIA
For every injured Survivor, all other Survivors get a 2% penalty to cleansing, sabotaging and repairing. If all Survivors are injured, this penalty gets an additional 12%, making it 20% total.
It’s a decent slowdown that can apply some pressure, however: injuring one or two Survivors gives a very tiny debuff, and despite it, Survivors will still have plenty of time to do their gens and other tasks.
To get the full value, you need to have everyone injured, but if you’re playing a normal Killer, this becomes hard because Survivors will usually heal to avoid the big penalty. Because of that, the perk tends to feel pretty weak.
Still, this perk can work extremely well on Plague, since she can easily keep Survivors constantly injured. And if someone dares to cleanse to get rid of the penalty, you get your Corrupt Purge, which can straight-up destroy them.
SEPTIC TOUCH
When a survivor is injured, you gain a token that increases your pickup, hook, and survivor drop speed by 4%, up to a maximum of 32%.
Although the effect seems fairly solid, it doesn’t effectively save you much time on survivors since the bonus builds up slowly. This perk can be useful against flashlight saves or pallet stuns, as survivors may misjudge their timing.
However, if you’re looking for faster and safer pickups, it’s usually better to choose “Fire Up,” which also boosts your other actions as the match progresses.
FRIENDS TILL THE END
When you get stunned or blinded twice, a Hex activates. Every time you’re stunned or blinded after that, the survivor is also blinded for 1.5 seconds.
The Hex is cleansed when its totem is destroyed, but it can be reactivated once you meet the condition again.
It’s an interesting but mediocre effect that doesn’t really confuse or punish survivors effectively. It can work with the “Enduring” perk to shorten your stun duration and help you take advantage of the effect — but it won’t always be reliable. Even though the Hex can return, it’s overall quite weak.
HEX: THE TRIRD SEAL
When you hit a survivor, they become Blind. Survivors must find and cleanse their own Hex to remove the effect.
This curse doesn’t apply much real pressure, but it can sometimes annoy survivors by cutting off their information about you, objectives, or teammates. It can also waste their time as they search for their personal Hex, giving you a small time advantage.
Unfortunately, against coordinated survivors on voice chat, this Hex becomes almost useless.
KNOCK OUT
When a survivor drops a pallet and moves 6 meters away from it within 6 seconds, they suffer a 5% Hindered effect for 5 seconds.
It can sometimes help you during a chase if the survivor drops a pallet prematurely or gets baited into doing so. However, the conditions and strength of the effect are quite weak to be truly helpful in most situations.
It might find some use in builds focused on slowing survivors down, but overall, it’s not a strong perk.
MAD GRIT
While carrying a survivor, your missed attack cooldown is removed, and if you successfully hit another survivor during the carry, the carried survivor cannot wiggle for 4 seconds.
This perk is quite similar to Dead Grip, which also makes struggling more difficult. In practice, though, this perk is more fun than practical. In most cases, survivors won’t try to harass or body-block you while you’re carrying someone (unless they’re being overly altruistic), and you can usually reach a hook safely anyway.
It can still be useful against altruistic survivors who try to save their teammate, effectively making their effort pointless. It also pairs well with carry-based perks like Mad Grit and Dead Grip for some amusing anti-save plays.
BLOOD ECHO
Each time you hook a survivor, all other injured survivors suffer from Exhaustion and Hemorrhage for 30 seconds.
This can slightly complicate things for injured survivors, making them more vulnerable and limiting their escape options. However, the effect is fairly short, and Hemorrhage doesn’t significantly impact healing unless you’re actively pressuring them during that time.
It can still be useful for finishing off survivors who lack strong exhaustion perks or healing options, but the perk only affects those already injured — so it’s not particularly punishing. Its value, however, can increase dramatically on killers who easily spread injuries, such as The Legion, The Plague, or The Ghoul
TERRITORIAL IMPERATIVE
If a survivor enters the basement, you see their aura for 6 seconds as long as you are at least 24 meters away from the basement. The perk has a 45-second cooldown.
Overall, it’s a pretty weak and situational source of information. Survivors rarely go into the basement, except to grab an item from the chest, cleanse a boon, or hide. Because of this, the perk almost never activates often enough to matter in real matches.
Still, it can occasionally be useful for tracking basement survivors who try to make risky plays down there — especially in endgame situations, where catching someone in the basement could seal the match.
HUMAN GREED
You gain the ability to kick chests, resetting their opening progress. You can also see the aura of all unopened chests on the map.
If a survivor is within 8 meters of a chest, their aura is revealed for 5 seconds. The kick action has a 10-second cooldown.
The perk is fun and goofy to use, but in practice it's not very effective — survivors don’t open chests often, so the perk provides very little value across the match. It might help in some rare situations, but it almost never has real impact on the game.
UNRELENTING
You now recover 30% faster after missing a basic attack.
Overall, the perk isn’t very useful. If you understand the game well and can time your swings correctly, your number of missed hits will be close to zero, so the effect provides almost no real value.
Sometimes you can intentionally whiff a basic attack to drop down faster or to check if a survivor is hiding, but even in those situations, the faster recovery rarely makes a difference.
If you want fast recovery on your basic attacks, it’s better to use Save the Best for Last, which reduces the cooldown of successful basic attacks throughout the match.
SHADOW BORN
When you get flashlight-blinded, you gain a 10% Haste for 10 seconds.
The bonus seems pretty solid and can let you catch up to Survivors with ease.
However, in actual matches, how often you get blinded can vary a lot — sometimes it’s a normal Survivor who doesn’t even try, sometimes it’s a full-on altruistic flashlight goblin who stares at you 24/7.
Even though the effect can activate rarely, and you might waste a chunk of the Haste just trying to reposition after the blind, it can still matter and let you punish Survivors for trying to blind you.
Also, unlike Lightborn, Survivors won’t know you have this perk.
SCOURGE HOOK: HANGMANS TRICK
You gain Scourge Hooks.
While carrying a Survivor, you can see the auras of other Survivors within 16 meters of your Scourge Hooks.
The effect is pretty weak — there are very few moments when Survivors are actually close to your Scourge Hooks.
And even if you do see their auras, you can’t really make good use of that info because you’re still carrying someone, and by the time you hook them, the others will already be long gone.
NONE ARE FREE
For every Survivor you hook, you gain 1 token.
Each token blocks all pallets and windows during the Gate Powering phase for 16 seconds (up to a max of 64 seconds).
Even though the effect sounds scary and pretty strong on paper, most of the timer ends up being almost useless.
You still need to find a Survivor first, and even then you have to hope they don’t instantly run to the exit gates.
Most of the time, you won't get full value out of the perk, and sometimes it ends up feeling completely wasted — the Survivors just rush out and escape anyway.
SCOURGE HOOK: MONSTOURS SHRINE
You gain Scourge Hooks.
Each time you hook a Survivor on one of these hooks, their hook stage is consumed 20% faster as long as you are more than 24 meters away from the hook.
Basement hooks also count as Scourge Hooks.
The effect is extremely situational and almost never useful.
If the hook progress speeds up, their teammates will simply come for the save earlier, so the perk barely changes anything.
And unfortunately, you can’t use this perk to camp, since the perk has a strict distance requirement that forces you far away from the hook.
Sometimes the perk might snatch an extra hook stage, but this happens very rarely.
NO QUARTER
When a Survivor’s healing progress reaches 75%, they start getting difficult Skill Checks that continue until the heal is completed.
Failing any of these Skill Checks regresses the heal and applies Hindered for 30 seconds.
This perk makes healing way stricter and riskier for Survivors — a single mistake can literally cost them their health state.
However, in normal matches the perk is almost useless, since hitting a few Skill Checks within a couple of seconds usually isn’t a real challenge.
The perk becomes more effective if you’re intentionally slowing down their healing speed, or if you’re running a full anti-heal build, where every bit of extra pressure matters.
IRON GRASP
The Survivor’s wiggle speed is reduced by 12%, and their wiggle sway strength is reduced by 75%.
This makes carrying Survivors a bit more stable since they won’t be shaking your camera all over the place.
But in practice the effect is pretty unnecessary and doesn’t really help you in any meaningful way. In most cases you’ll reach any hook just fine without worrying about them wiggling free.
And even then, Dead Grip is significantly weaker than Agitation in terms of practical value.
Still, it can occasionally save you in clutch moments — for example when altruistic teammates try to bodyblock you so you can’t secure the hook.
UNDONE
For every failed Skill Check a Survivor makes, you gain 3 tokens (up to 30).
Each token gives you +1% bonus regression and 1 second of Gen block on your next Gen kick
(capping at +30% regression and 30 seconds of block).
The max effect sounds insanely strong — and it actually is —
but the condition is ridiculously inconsistent and weak:
Survivors need to fail Skill Checks.
In most matches, the chance of a Survivor failing a Skill Check because they were distracted is basically zero. And even if they miss one while you’re nearby, it still won’t happen often enough for you to farm many tokens.
On top of that, you can’t combo this perk with things like Overcharge or Oppression, since those forced Skill Checks don’t count toward the tokens.
The perk can be decent against inexperienced or clumsy Survivors,
but overall it’s unreliable and rarely worth a perk slot.
SEPTIC TOUCH
When survivors heal within your Terror Radius, they suffer from the Blindness and Exhausted status effects. These effects linger for 30 seconds after they stop healing or leave your Terror Radius.
The perk isn’t overly oppressive, but it can make healing more uncomfortable and deny survivors their speed perks like Sprint Burst or Lithe if you approach them mid-heal.
However, in practice, survivors will usually heal behind cover or move to safer areas, making the perk less impactful. Still, it can work well in anti-heal builds or Terror Radius-focused builds, adding some extra pressure in certain situations.
WHISPERS
When a Survivor is within 32 meters of you, the Entity whispers, letting you know they’re nearby.
It’s a pretty unusual perk, but not very reliable — even though it tells you a Survivor is close, you still have no clue where exactly they are, since they could be anywhere in that radius.
While the perk does warn you about a Survivor’s presence, it’s generally better to run more consistent info perks that actually show you their position.
HELP WANTED
When you damage a generator, it becomes defective.
If Survivors finish repairing that defective generator, the perk activates for 60 seconds. During this time, your basic attack cooldown is reduced by 25%.
The perk is very similar to Machine Learning, with almost the same activation condition.
Unfortunately, this bonus is even weaker than the one from Machine Learning and won’t really help you turn the tide of the match. Even though your attacks recover faster — letting you act sooner or regain your speed faster — you’ll only get real value out of it a few times during its active duration.
On top of that, the activation condition is quite awkward: you must purposely choose a generator that you don’t care about and let Survivors finish it, while keeping the rest under control.
Still, the perk can show some strength during camping, especially when paired with Save the Best for Last, making it much harder for Survivors to unhook their teammate.
HEX: HUNTRESS LULLABY
For every Survivor you hook, you gain a token.
Each token reduces the time between the skill check warning and the actual skill check.
At 5 tokens, the warning is completely removed.
The perk also increases the regression penalty for failed skill checks.
This makes repairing generators or healing teammates much more unpredictable and stressful for Survivors. However, experienced players who always stay focused on skill checks won’t be too threatened by losing the warning — they’ll still hit them consistently.
On top of that, this is a Hex perk, meaning Survivors can cleanse it early or later in the match, preventing the perk from confusing them for long.
It can be used in certain builds focused on forcing failed skill checks, especially since this Hex also gives an extra 6% penalty on failed checks.
HEX: OVERTURE OF DOOM
You are have a hex totem. While this Hex is active, the generator farthest from you becomes Cursed. If a Survivor has worked on that generator within the last 5 seconds, the Perk transfers your Terror Radius to that generator and grants you Undetectable for 30 seconds.
When Survivors finish repairing the Cursed generator, the Hex jumps to the next farthest generator.
This Perk can help you confirm where Survivors are and sneak up on them unnoticed.
However, the effect is very limited and inconsistent, since it only works with the single farthest generator and cannot be applied to all gens.
If you want to ambush Survivors more reliably and stay hidden throughout the match, Dark Devotion or Trail of Torment offer much more stable stealth value.
HAYWIRE
Now Exit Gates can regress at 100% regression speed until they drop to 80% progress.
The regression itself is almost completely useless — even if Survivors try to 99% a gate, this only adds about 4 extra seconds of interaction before they can safely open it and escape while you chase the unhooked Survivor.
Overall, the effect is extremely weak and provides almost no real value at the endgame.
However, it can be paired with other endgame slowdown perks to make opening the gates slightly more annoying for Survivors.
INSIDIOUS
If you stand still for 1 second, you gain the Undetectable status effect until you move again.
Undetectable can be great for catching Survivors off-guard and playing sneaky.
However, the activation requirement is very awkward and extremely limited. In most situations this perk ends up being almost completely useless in real map setups or during chases.
Sometimes you can camp in one spot and wait for a Survivor to walk into you so you can smack them by surprise, but this takes too much time and is almost never worth it.
Also keep in mind: once you start moving again, after a short delay nearby Survivors will hear a loud “movement cue” sound that gives away your position, which makes the perk even less reliable.
IRON MAIDEN
You can open lockers 50% faster.
When a Survivor jumps out of one of these lockers, their aura is revealed and they become Exposed for 30 seconds.
It’s a very unusual perk that lets you deal with lockers more effectively and punish Survivors who try to hide inside. However, the Exposed effect is pretty short, and in practice it’s hard to get real value out of it. Survivors rarely hide in lockers — and once they realize you’re running this perk, they’ll avoid lockers entirely.
Sometimes it can help you set up ambushes or track down a Survivor in the endgame when they hide to avoid giving away their location after their teammate dies — but that doesn’t happen often.
Still, the perk does have some niche utility: it lets you reload faster on Trickster or Huntress, giving you an extra second of uptime, and it also lets you pull Survivors out of lockers quicker, making flashlight saves essentially impossible.
HEX: NOTHING BUT MISERY
After you land 8 Basic Attacks on Survivors, the Hex becomes active.
While the Hex Totem is standing, every one of your basic hits applies a 5% Hindered effect for 15 seconds.
The effect itself isn’t strong, but it can be very punishing, making Survivors fail to reach a pallet or vault in time.
However, activating this perk requires you to land eight basic attacks, and only with standard M1s, which can easily take half the match.
The slow also triggers only from regular attacks, which limits its value for killers who rely on their powers rather than M1s.
Considering all of its drawbacks, the perk ends up being less appealing than it could have been.
SHATTERED HOPE
When you snuff a Boon Totem, you destroy it completely and gain 8 seconds of Survivor Aura reading.
This perk was originally designed to help Killers deal with Boon perks, giving you and other Killers some extra value against them.
However, Boons are picked very rarely nowadays, so worrying about them isn’t really worth it.
Even though this perk lets you permanently remove a Boon to limit further blessing, it often ends up doing very little, since Survivors can simply bless other Totems across the map.
It can synergize bad with some Hex perks, though sometimes it ends up hurting you instead.
Overall, this perk simply isn't worth taking anymore, especially since Survivors no longer abuse Circle of Healing, which used to give them near-constant, large-radius self-healing.
DOMINANCE
When a Survivor interacts with a Chest or a Totem, the Entity blocks it for 16 seconds, and you can see the aura of the blocked object.
This can significantly delay Survivors from opening Chests for a while, often discouraging them from continuing and forcing them to move on.
However, the block duration is fairly short, making it difficult to truly prevent interactions, especially since the blocking effect only triggers once per object.
You can use this perk to keep an eye on your Hex Totems, knowing exactly when Survivors touch them, but it doesn’t protect them nearly as well as other Hex perks do.
FORCED HESITATION
When a Survivor is put into the Dying State, all other Survivors within 16 meters become Hindered by 20% for 10 seconds.
The perk has a 30-second cooldown.
This perk can help you punish Survivors who stick too close, try to blind you, or attempt a pallet stun. However, the radius is pretty small, and the perk triggers instantly even if no other Survivors are around, wasting the cooldown for nothing.
It can be used for slug setups, especially on Bubba, but it’s a risky and niche strategy.
DISTRESSING
Your Terror Radius is permanently increased by 30%.
Sometimes this can slightly throw Survivors off since they're used to your default TR range, and they might misjudge your actual position. But most of the time, this perk hurts you way more than it helps — it makes you way easier to hear and removes any chance of sneaking up on Survivors while they're busy, giving them around 3 extra seconds to react to your presence.
It can be used on Doctor, Legion, or in very niche anti-heal or “gimmick” builds, but overall it’s more of a downside perk than anything actually useful.
UNNERVING PRESENCE
When Survivors are inside your Terror Radius, their Skill Check success zones are reduced by 60%, and the chance of Skill Checks appearing is increased by 10%.
This perk is pretty underwhelming and extremely limited. In the best-case scenario, Overwhelming Presence can actually help experienced Survivors hit more Great Skill Checks, since the “Good” zone becomes smaller.
It only really bothers newer players who haven’t mastered Skill Checks yet and will fail them more often, giving away their location.
The perk works best in anti-heal builds, especially when paired with Coulrophobia, making healing Skill Checks almost impossible to hit.
 The Trapper
 The Wraith
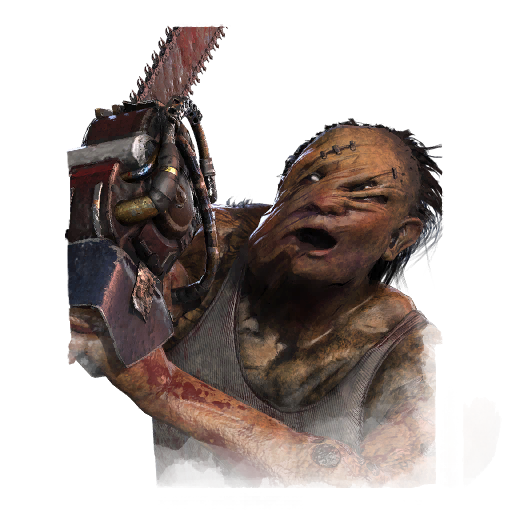 The Hillbilly
 The Nurse
 The Shape
 The Hag
 The Doctor
 The Huntress
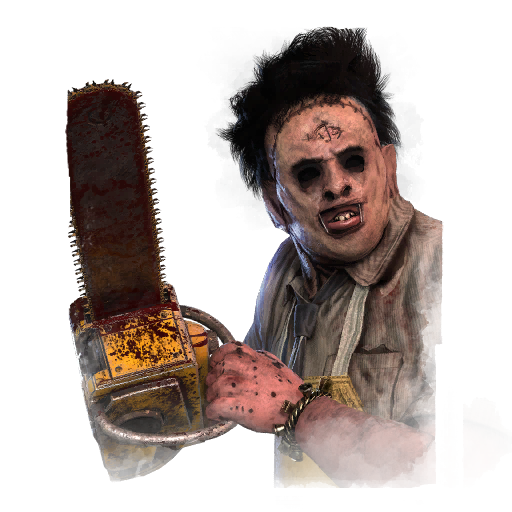 The Cannibal
 The Nightmare
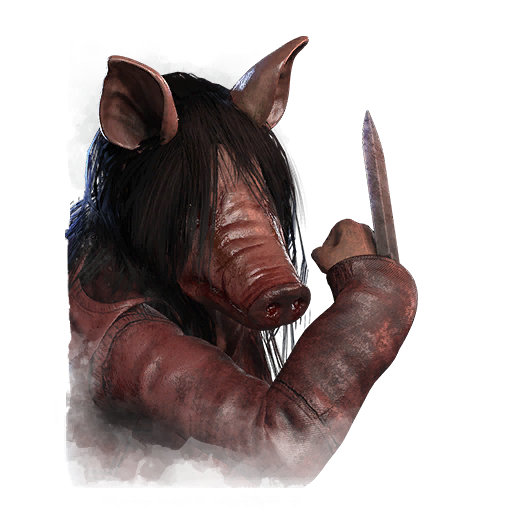 The Pig
 The Clown
 The Spirit
 The Legion
 The Plague
 The Ghost Face
 The Demogorgon
 The Oni
 The Deathslinger
 The Executioner
 The Blight
 The Twins
 The Trickster
 The Nemesis
 The Cenobite
 The Artist
 The Onryō
 The Dredge
 The Mastermind
 The Knight
 The Skull Merchant
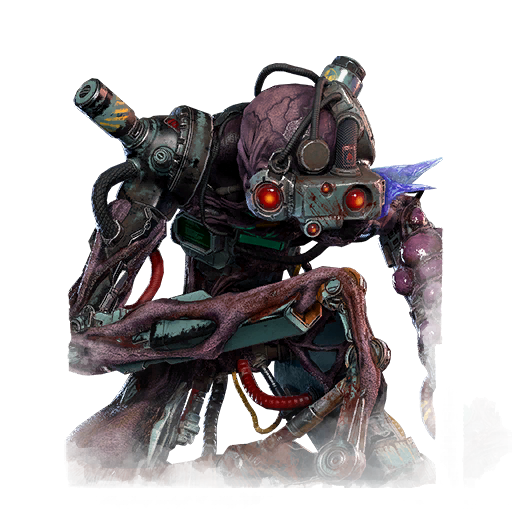 The Singularity
 The Xenomorph
 The Good Guy
 The Unknown
 The Lich
 The Dark Lord
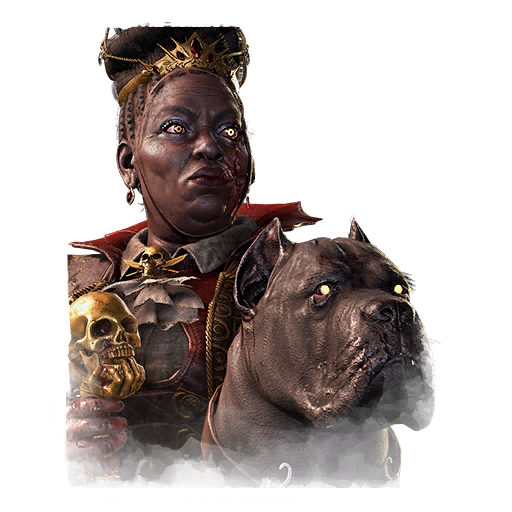 The Houndmaster
 The Ghoul
 The Animatronic
 The Krasue
 The First


.webp)